Painted Pumpkin Ideas: From Plaid to Polka Dot
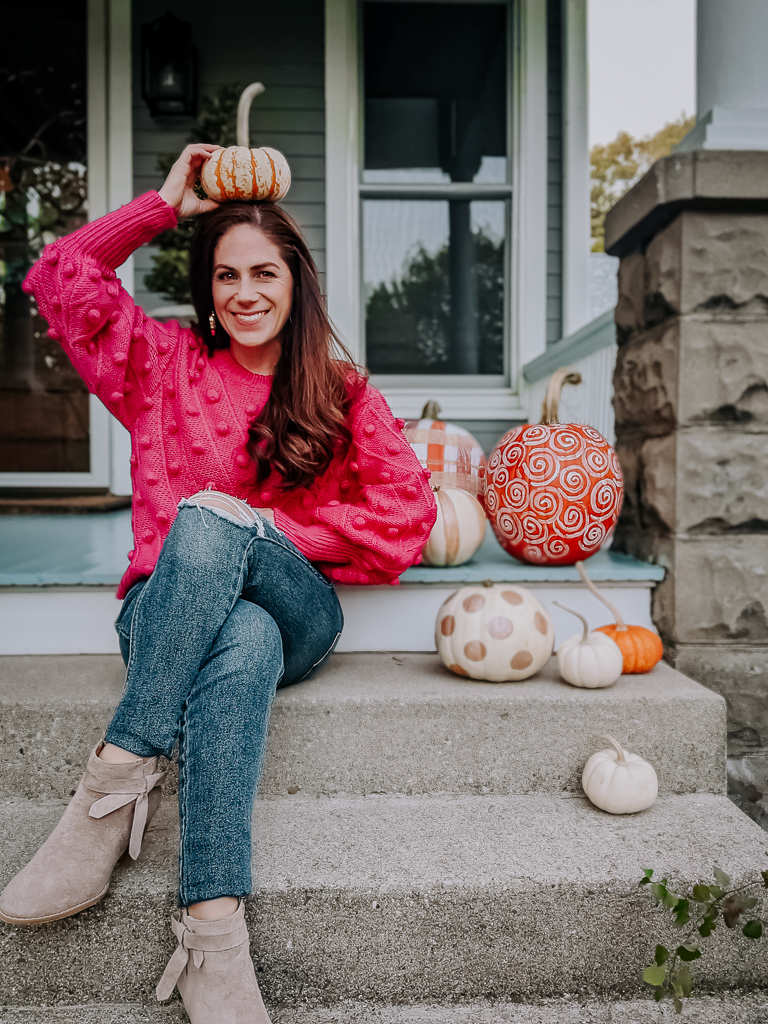
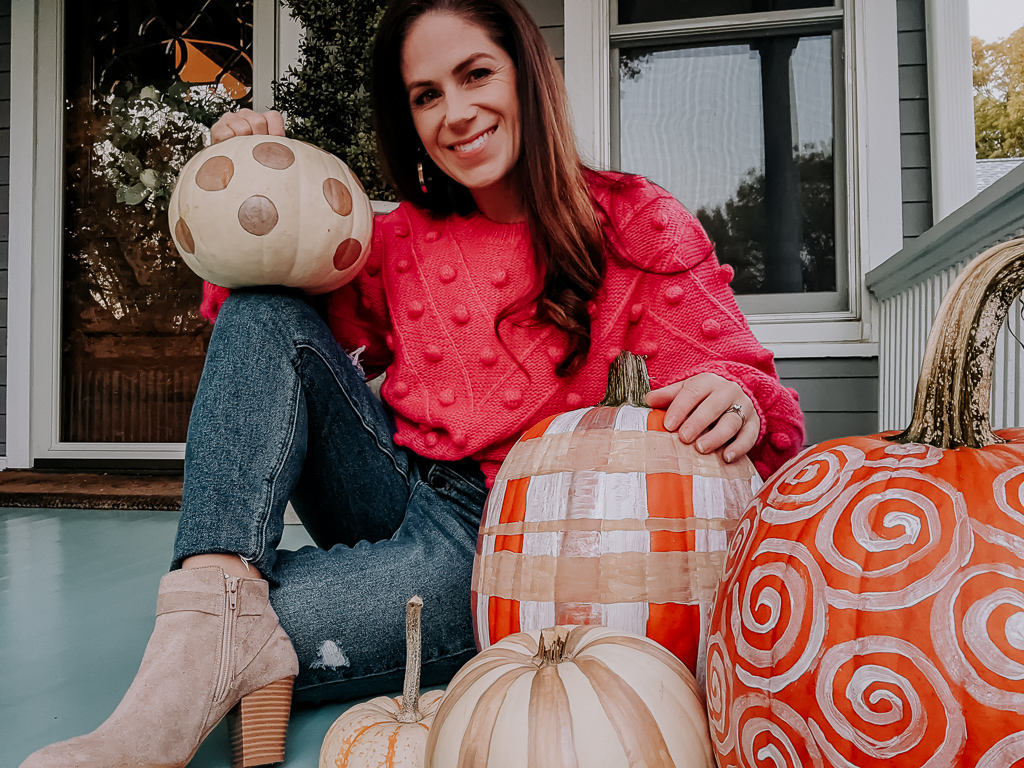
Anyone else feel a bit behind this season? It’s like I blinked… and we suddenly morphed from summer to Halloween! Fall has always been one of my favorite seasons to decorate for—and while I love carving pumpkins—I wanted a few porch options that would work past Halloween. I always get so sad when those carefully carved faces start to droop. Wouldn’t it be nice if you could have that “styled” porch look beyond spooky season? Enter the painted pumpkin! This décor is fitting for Halloween and fall harvest. It offers that Thanksgiving vibe, you can really keep around. So, here are a few painted pumpkin ideas to try from plaid to polka dot…
Best of all, they’re SUPER easy to create!
Why consider painted pumpkin ideas?
- They have staying power
Carved pumpkins generally last 3-5 days (in warmer climates) or up two weeks in colder areas w/ fridge storage. A painted pumpkin blows that timeline out of the water. You can keep these 2-3 months, provided they are out of the sun and freezing temperatures.
- It’s a kid-friendly project
Not ready to let your kiddo handle a knife? Painted pumpkins are a safe alternative. However, be aware that things can get messy. It’s always a good idea to lay a garbage bag, paper bag or bit of plastic down to protect your table or counter. I let my three-year-old go wild with a brush. He loved the experience! If you don’t feel comfortable letting your child use real paint, children Hudson’s age and younger are equally happy “painting” their pumpkin with water. I started him with water, but when he saw mommy using the real thing, he needed color!
- Less mess, Less time
Contrary to what you might think, painted pumpkin ideas are really easy. You don’t need to be Rembrandt to do this. It does not require a high skill level or precision. In fact, free-hand/relaxed scribbling will give your pumpkins that unique and handmade touch. Don’t aim for perfection with your painted pumpkin ideas. Their beauty rests in loose, uninhibited strokes.

Painted Pumpkin Ideas: Supply List
- Pumpkins (ideally a mix of sizes and colors – white & traditional)
- Paintbrushes (small)
- Pencil
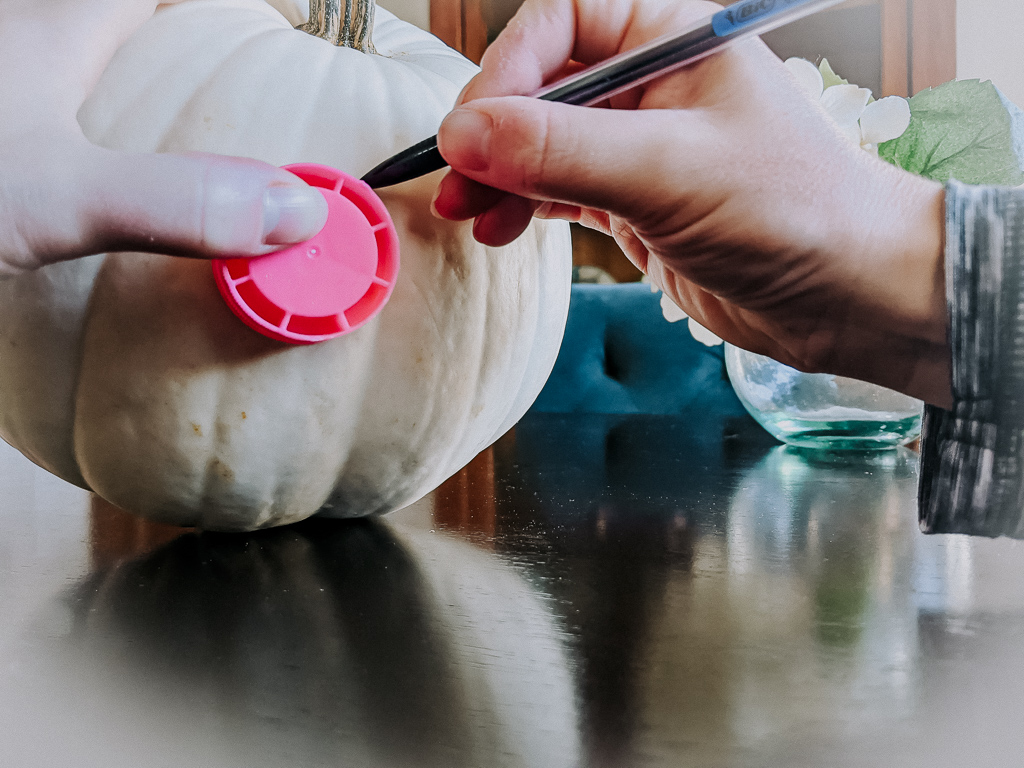
- Circular object for tracing (I used the cap from a bubble container)
- Craft paint
- Garbage bag, paper bag, or plastic to protect your surface
- Bowl of water for rinsing
- Paper towel for clean ups
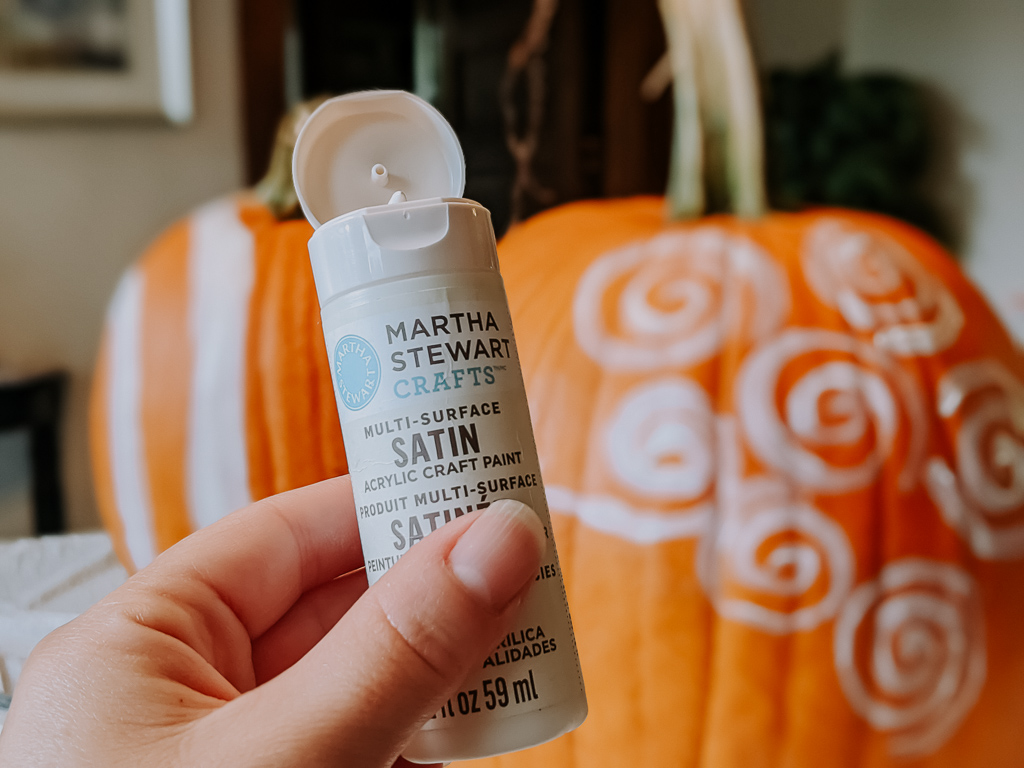
You can use any acrylic craft paint for this project. My personal favorite is from Martha Stewart and features both satin, pearl and metallic finish options. The paint has always performed well and lays on nice and thick, which you definitely need when dealing with pumpkins. I find the paint works best on pumpkins when you don’t cut it much—or at all—with water. I add just a tiny bit to soften it, but no more.
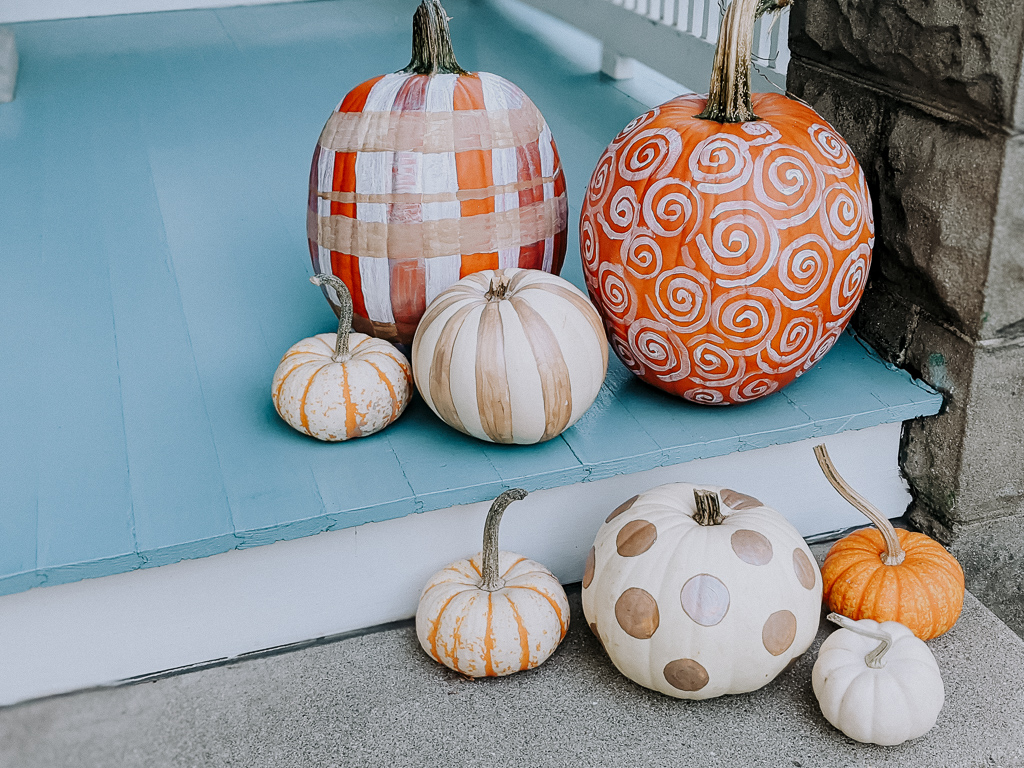
In terms of color options, the sky’s the limit! This is where you can really have fun and get creative. However, if you are after a subdued and naturally elegant look like this pumpkin grouping, you will want to choose neutral tones. I used a mix of taupe hues and ivory, plus a bit of metallic silver and bronze. We had a decent stash of craft paint in our junk drawer, so I didn’t have to buy any specific colors for our painted pumpkin ideas. But, here are a few colors I’d recommend if you want a similar look…
- Martha Stewart Satin – “Acorn”, “Summer Linen”, “Sandcastle”
- Martha Stewart Metallic – “Champagne”, “Copper”, “Brushed Pewter”
Painted Pumpkin Ideas: Get the Look
Preparing the pumpkin
Before you begin painting, make sure you have a clean pumpkin. You need a good base and work surface. Wash and dry your pumpkin so the paint will adhere properly. Depending on your design, your next step is using a pencil to sketch out where you want your paint to go. While I like painting impromptu, the irregularity of pumpkins requires a bit of planning for your design to look uniform. Now, let’s get painting!
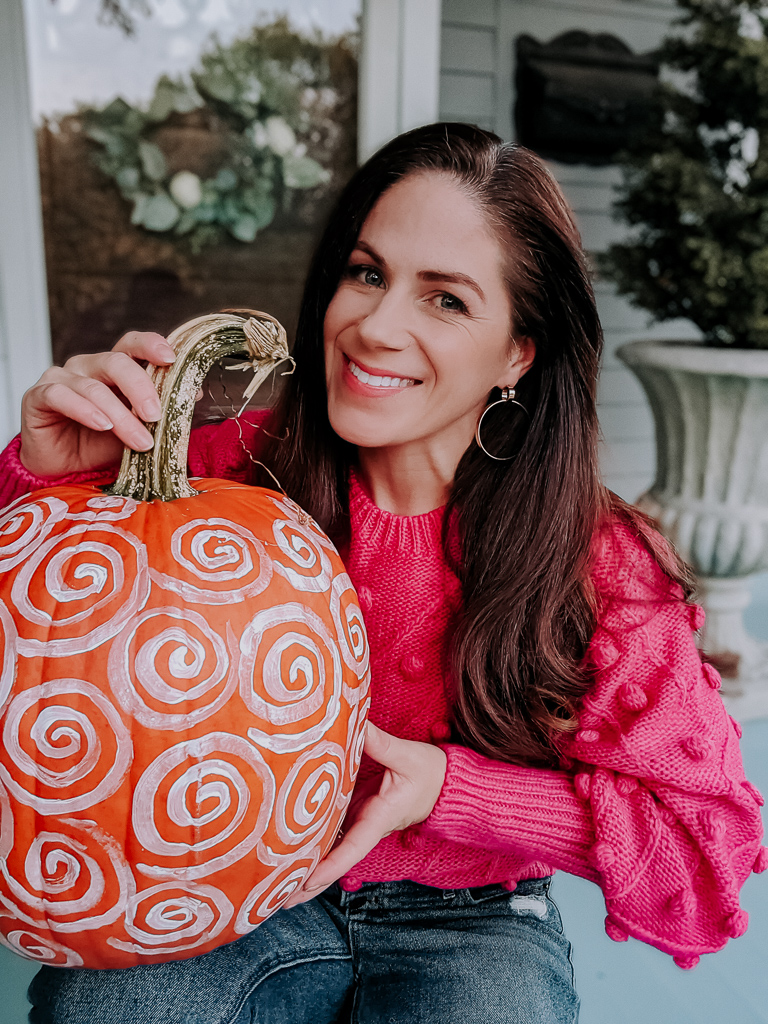
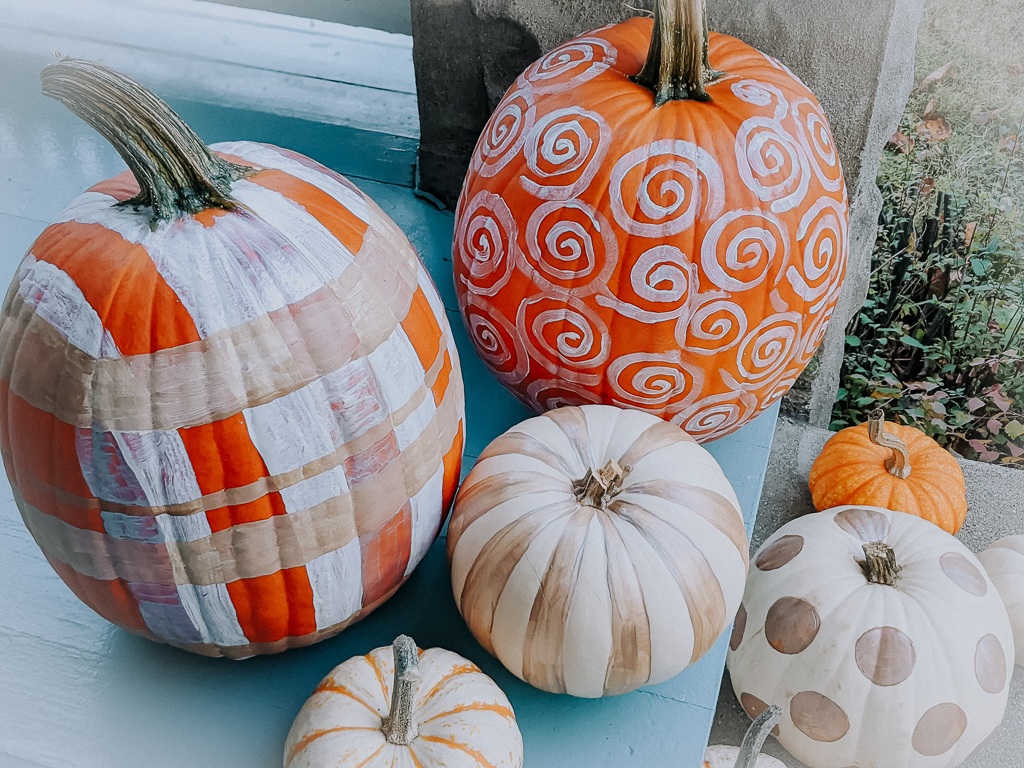
Painted Pumpkin Ideas – “The Swirl Pumpkin”
For the swirl pumpkin, choose a paint color opposite of your pumpkin (e.g. white for orange pumpkins, or tan for white). Work your way around, filling the entire surface with spirals using a flat small brush. A round brush would work too. I found that painting the spiral quickly gave me a better result than moving slowly and trying to be precise. Bottom line: You can’t be “perfect” when painting on a natural surface. In fact, you’ll drive yourself crazy attempting it!
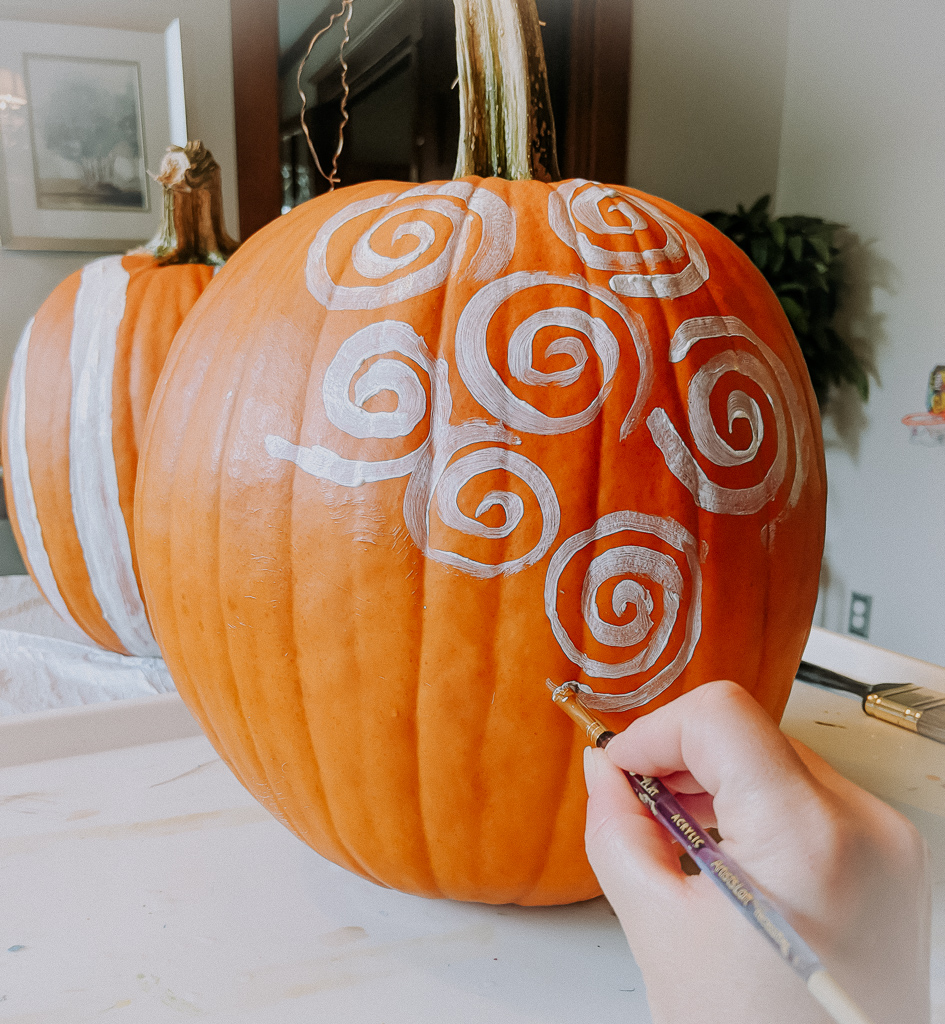
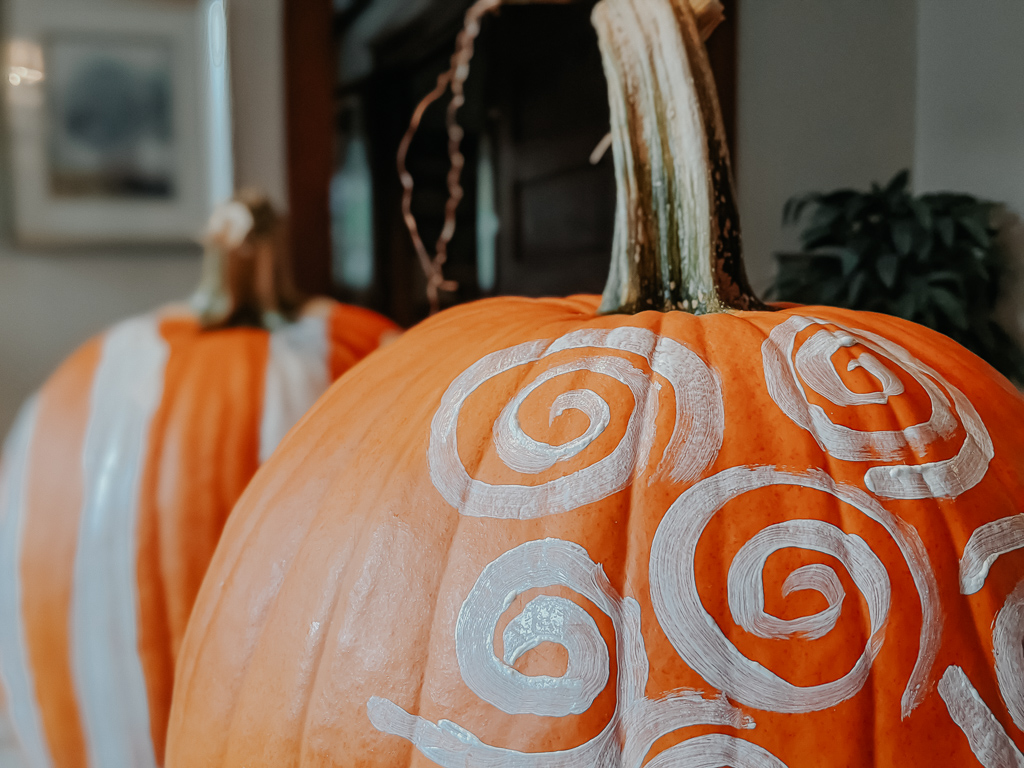
Be sure to extend your swirls up to the top and down to the bottom of your pumpkin. I also occasionally varied the direction of my swirls. Keep in mind, you will probably need to let part of your pumpkin dry, so you can gain access to the top and bottom without smearing what you’ve already painted. I didn’t try this method, but I’ve seen several people recommend using thumb tacks (5-10 poked into the bottom of the pumpkin) to prop it up off the ground for drying purposes. Smart idea, right?
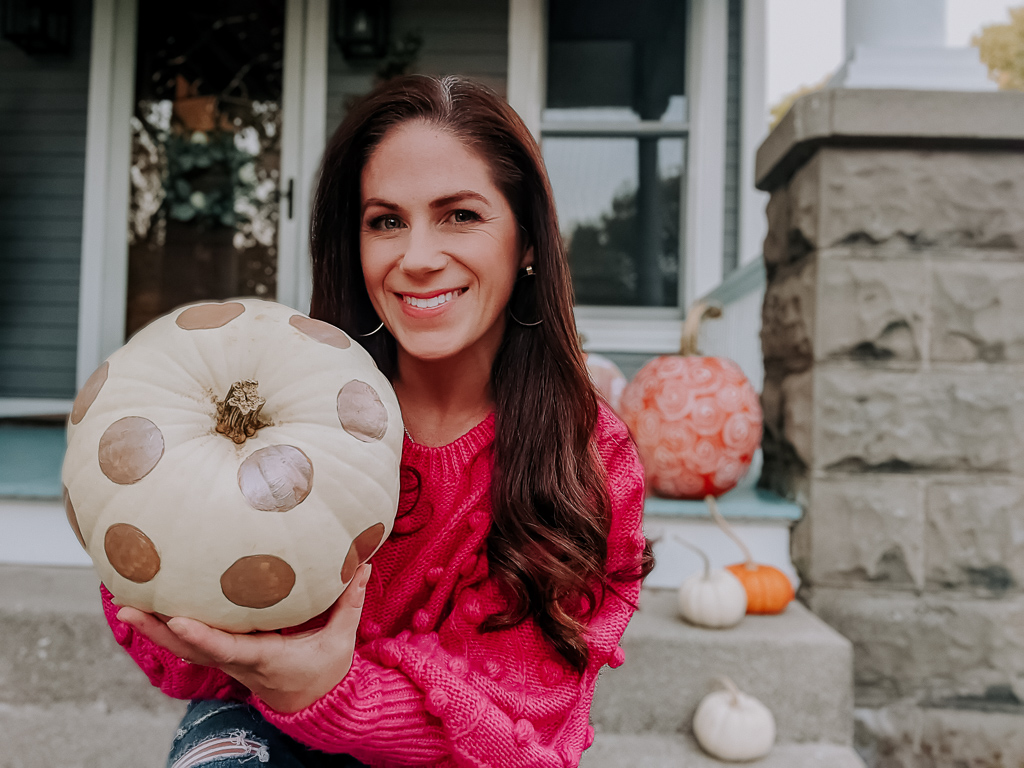
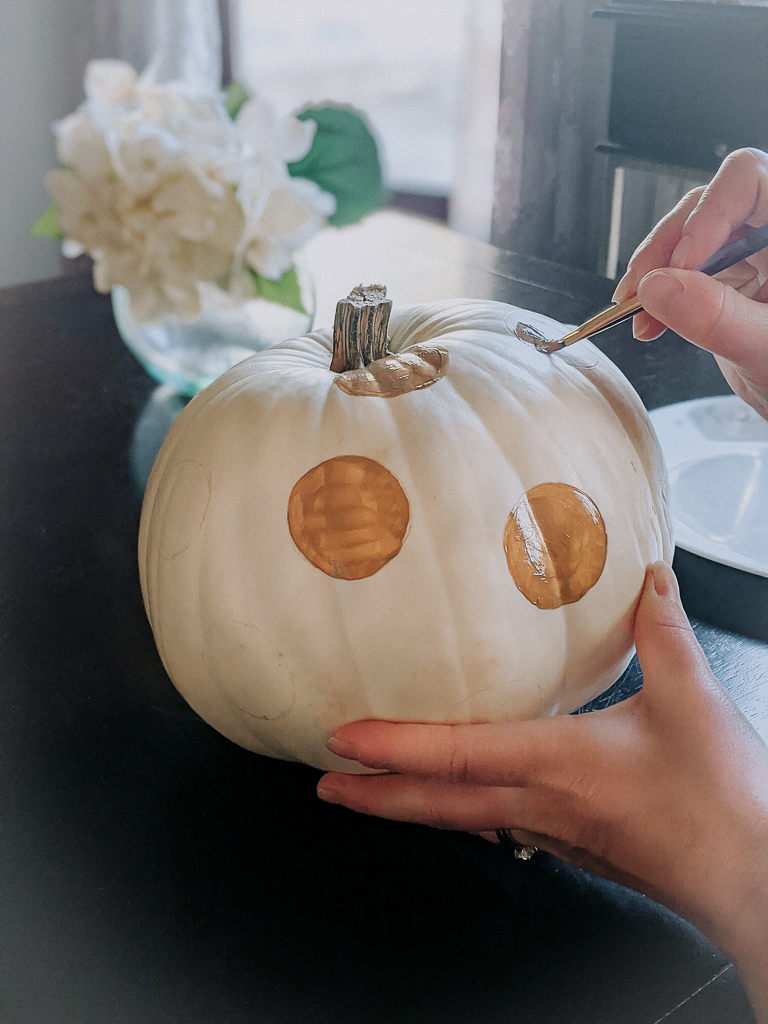
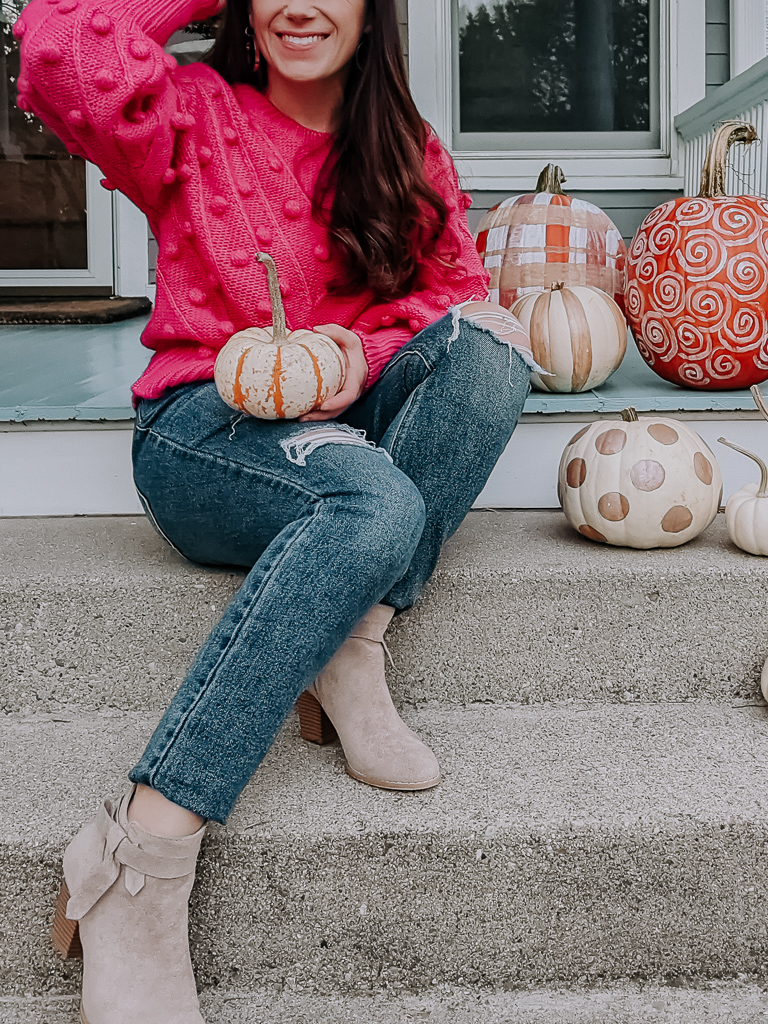
Painted Pumpkin Ideas – Polka Dot Pumpkin
Grab a circular object (I used a bubble container cap). You could also use coins for smaller dots or a milk cap. Using your pencil, trace evenly spaced circles all around your pumpkin. Make sure your extend the the dots to the top and bottom too. Otherwise, it won’t look complete.
Fill in your circles with a thick layer of paint using a small brush. I find flat-bristled brushes the easiest to work with, as you can get a nice clean edge. You will likely need two coats of paint. I did one layer of taupe, then a second layer of metallic.
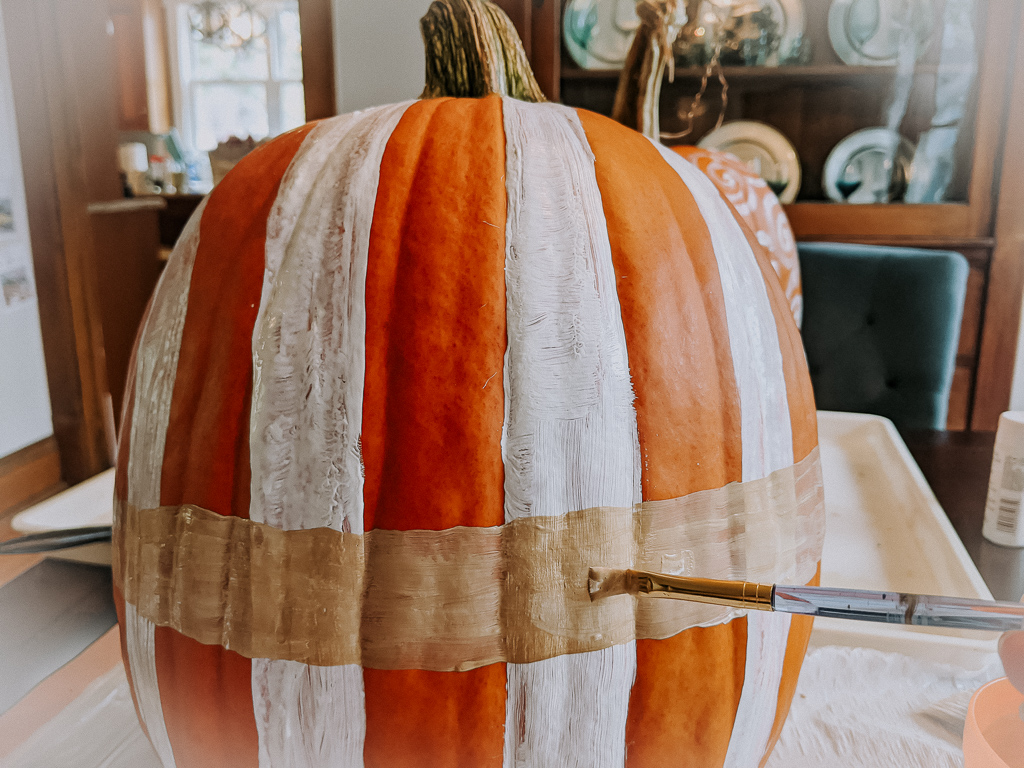
Painted Pumpkin Ideas – Plaid & Buffalo Check
If you look closely below, you will see my plaid pumpkin was a bit of an oops moment… To get this design to work properly, you need to paint curved lines, so you follow the natural shape of the pumpkin right into the stem. I attempted to keep my lines straight running around the pumpkin. It just doesn’t work that way! In my defense, I was a bit distracted while painting that one. Hudson was working on his pumpkin at the same time and thought it would be fun to paint his face too, lol. But I digress…
To achieve a plaid or buffalo check look, you will want to paint vertical lines that are similar to the striped pumpkin I did below. Once you have the vertical lines complete, you need to add a few horizontal lines wrapping around the pumpkin.

For buffalo check, use the same color paint for your horizontal line. Next, mix a darker tone of that paint by adding black or switching to another shade in that color family. Go back to your vertical lines and paint the “squares” where the vertical and horizontal lines meet that darker shade. For a plaid pumpkin, you want to vary the thickness and colors of your horizontal lines, making sure you have some lines that are very thin. I found it helpful to pull up images of plaid patterns on my phone for inspiration.
Have any great painted pumpkin ideas?
I’d love to hear them! Happy painting my friends!
Related Posts

Fall Lantern Decor – Elegant Porch Ideas
The period after Halloween and pre-Christmas can be a little tricky for front porch…
November 2, 2023
izle | 16th Jan 21
I must thank you for the efforts you have put in writing this site. Felita Miguel Port