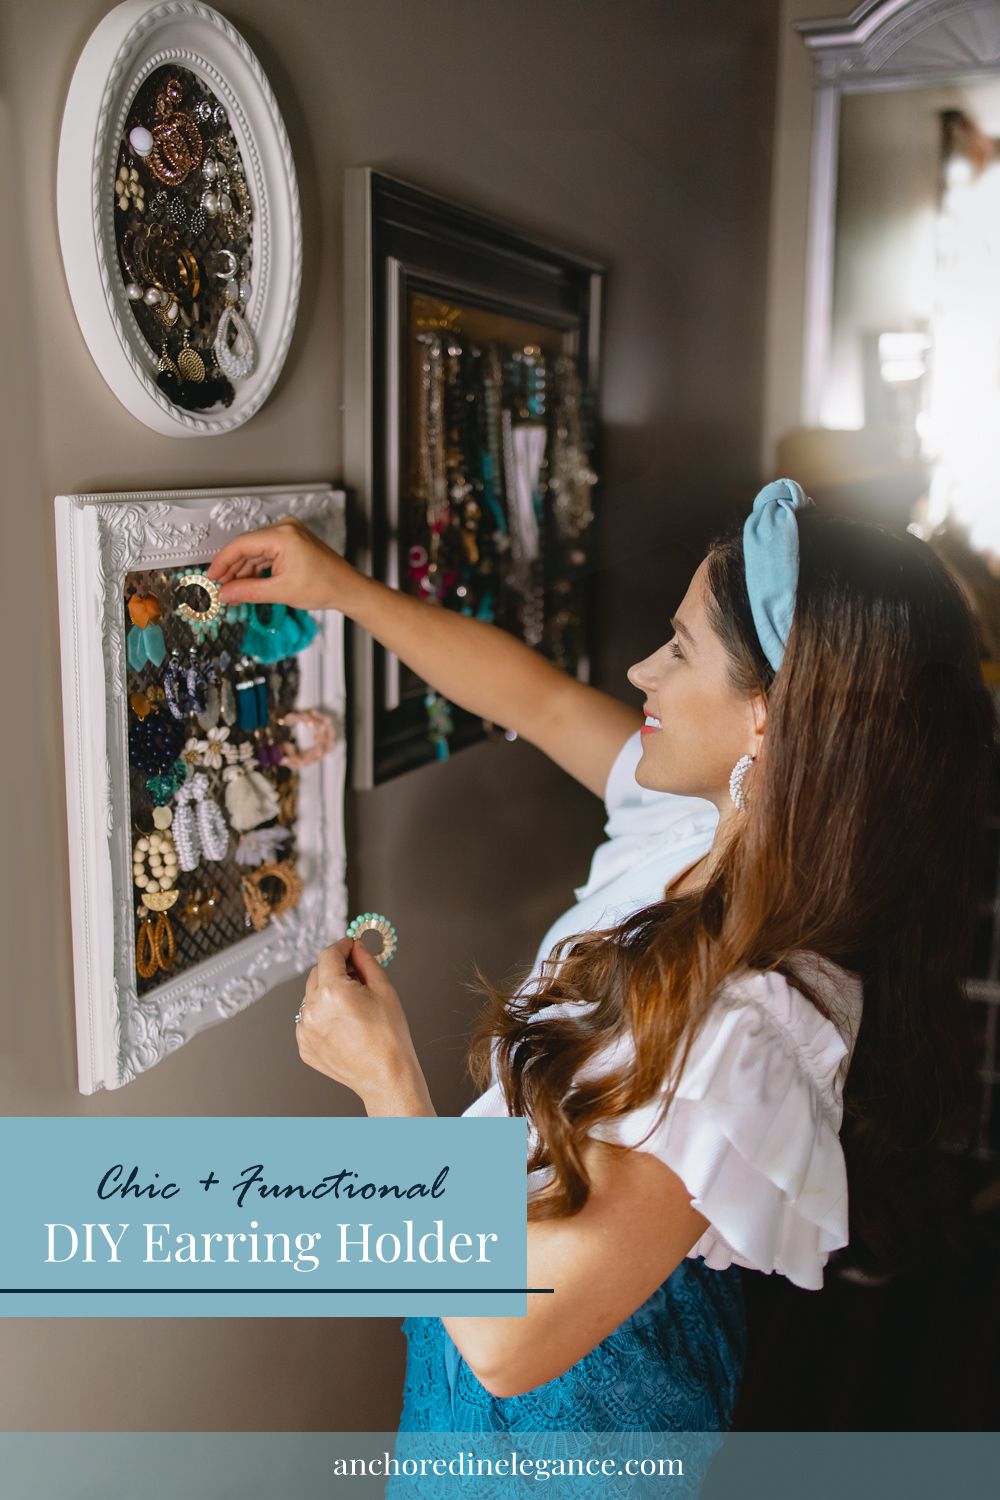
Ingenious DIY earring holder
Have you ever gone to grab your favorite pair of earrings, only to find them buried in a twisted, tangled web?
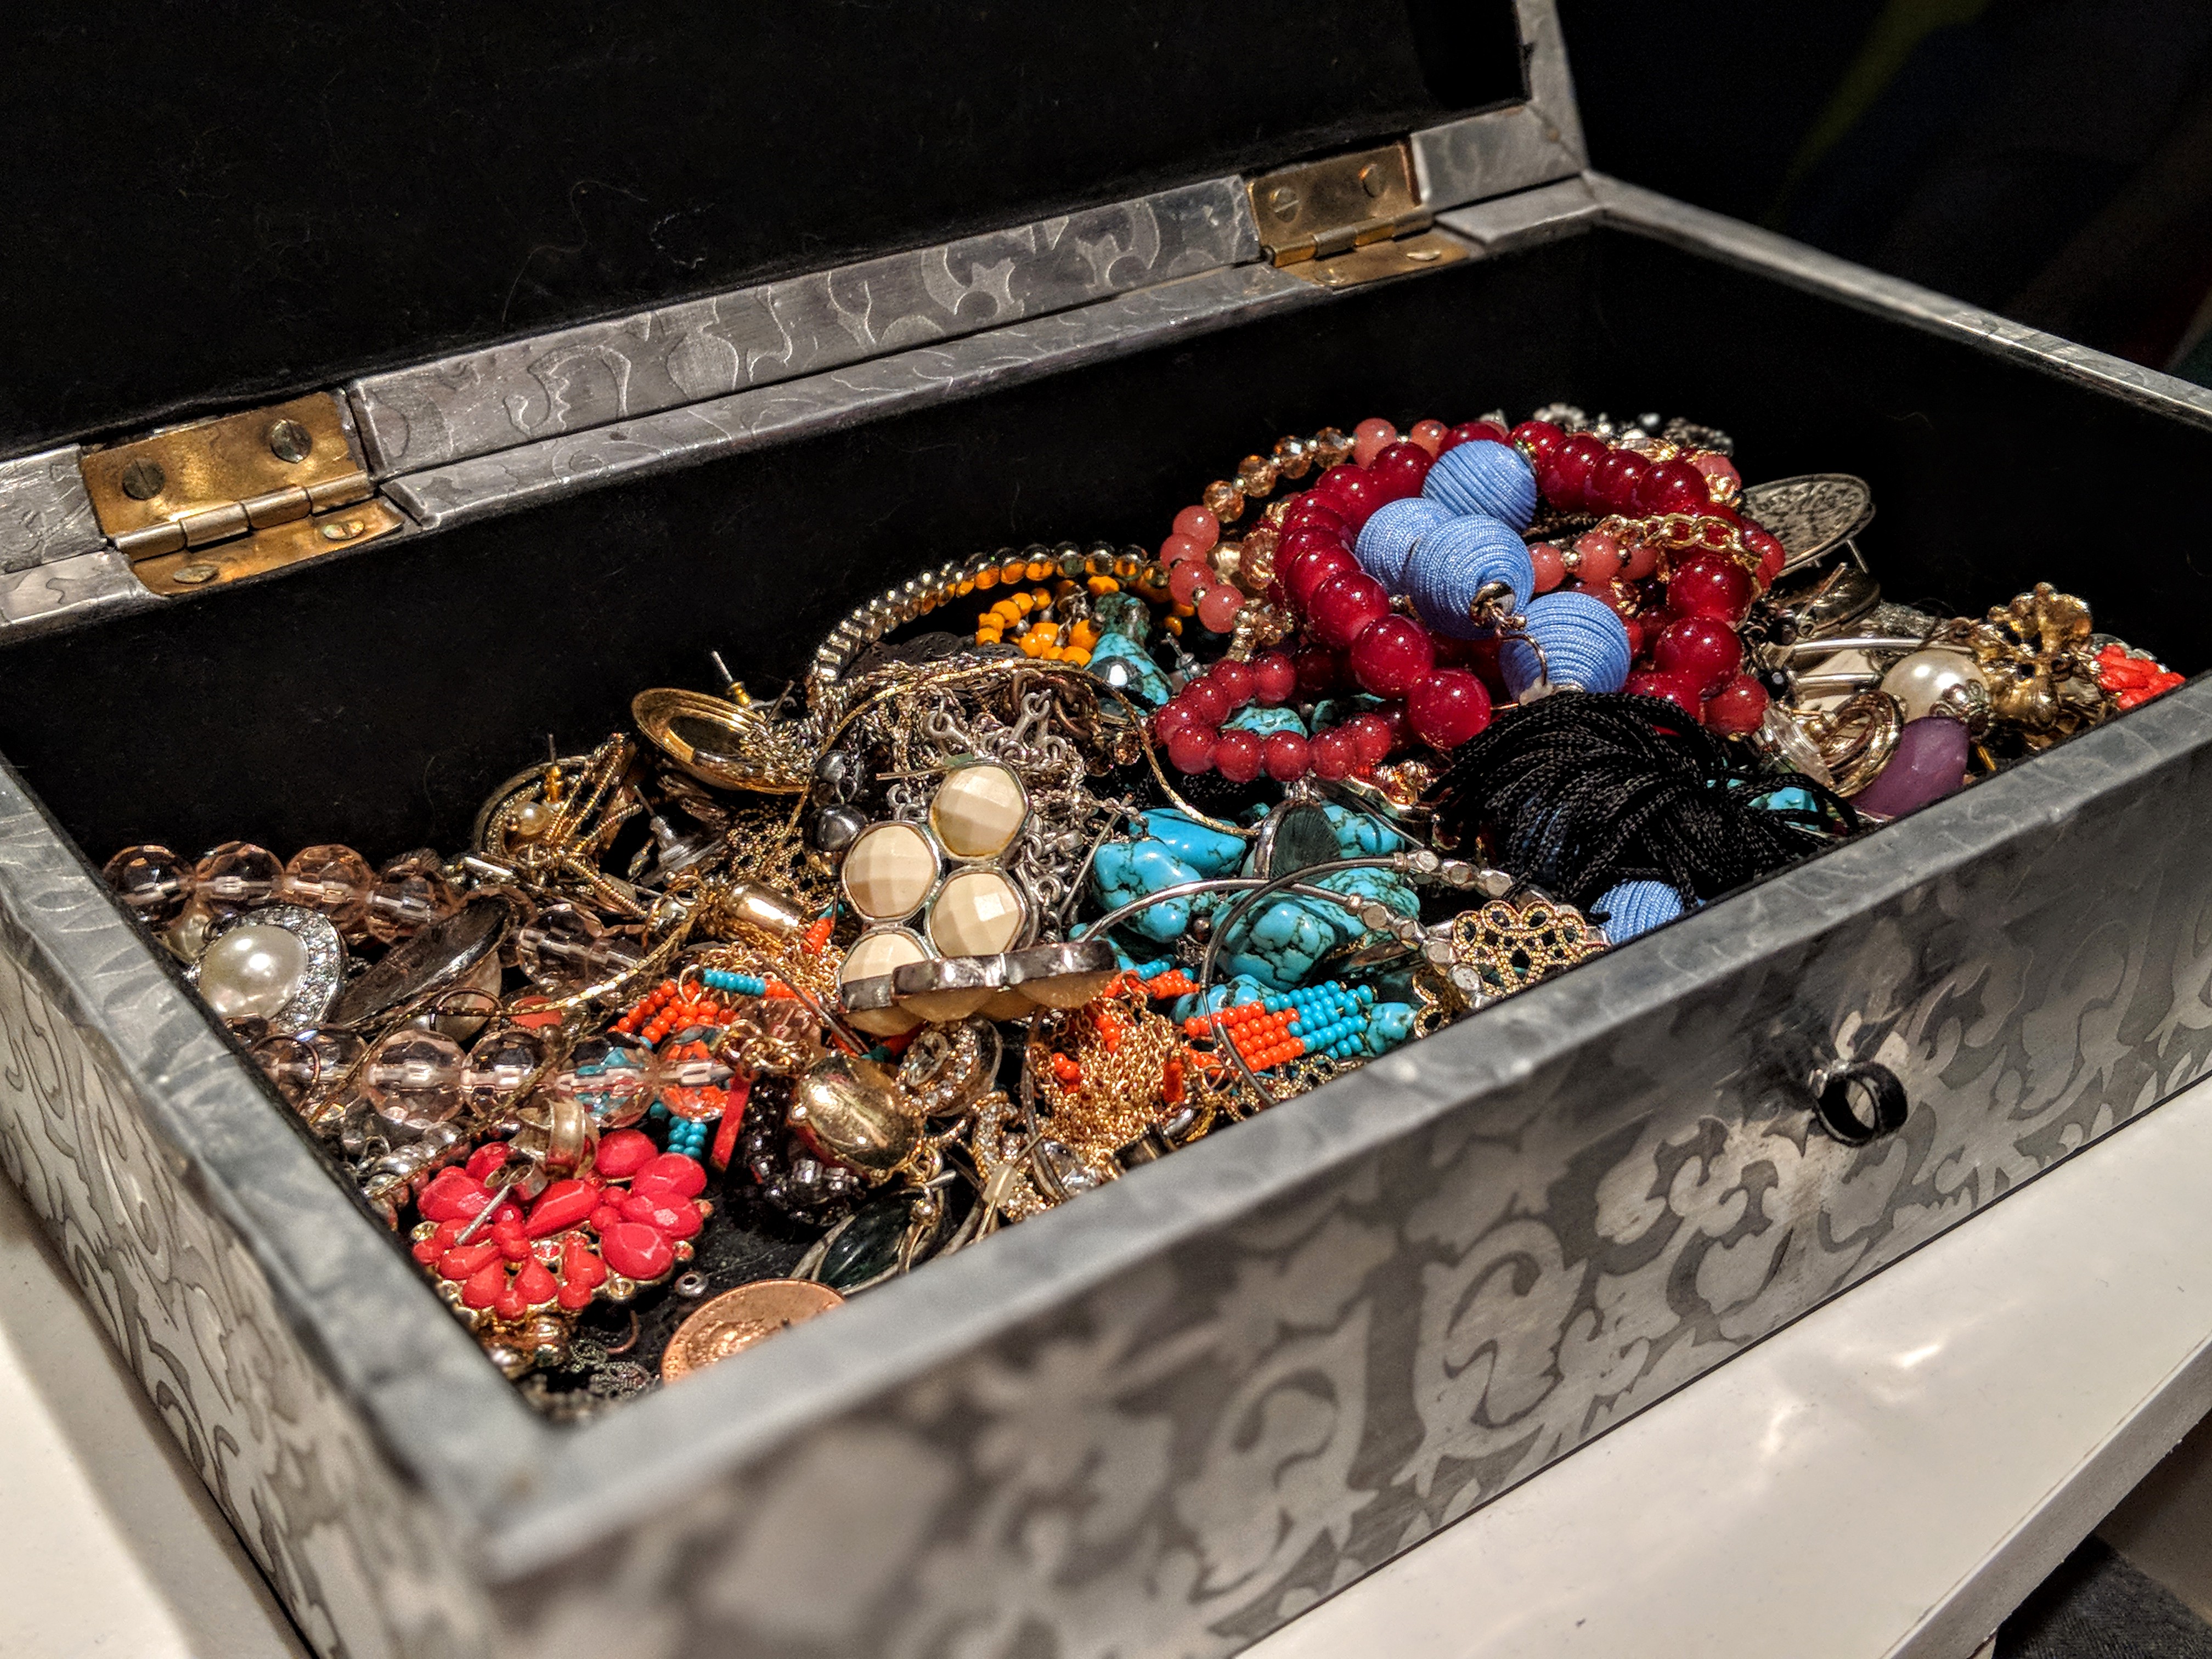
I’m not sure “hot mess” goes quite far enough when attempting to describe the complete disarray that was my previous jewelry storage solution. I had a small silver box and tossed everything inside. Fortunately, there is a better way—and you can make this beautiful earring holder yourself!
When I say make, I’m not talking about serious construction. This DIY earring holder is super easy. In fact, it only takes about 10 minutes. I have directions and step-by-step photos below…

Before we dive in, I must give credit where credit is due. I got my inspiration for this project at an adorable boutique in Sister Bay, Wisconsin called Spot.
Side note: If you ever get the chance to visit Door County, the peninsula of Wisconsin, DO IT! Think stunning water views, quaint towns and enough artistic inspiration to last a lifetime.
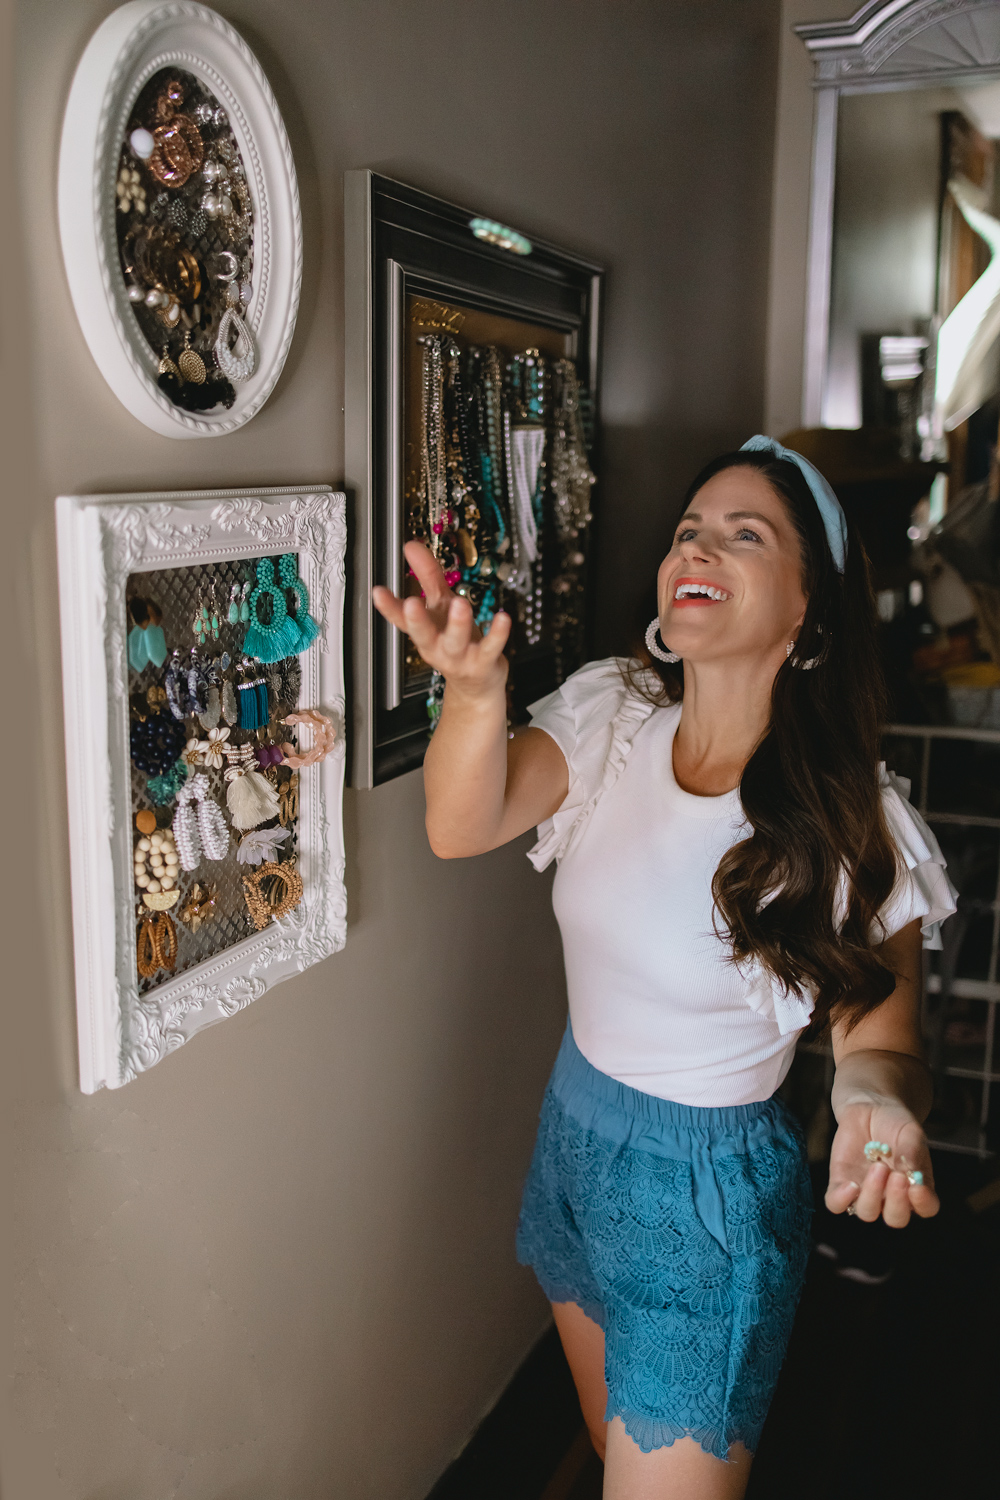
While browsing Spot’s earring collection, I fell in love with the store’s clever display solution. The shop owners use a picture frame with chicken wire to showcase their collection of dangle earrings.
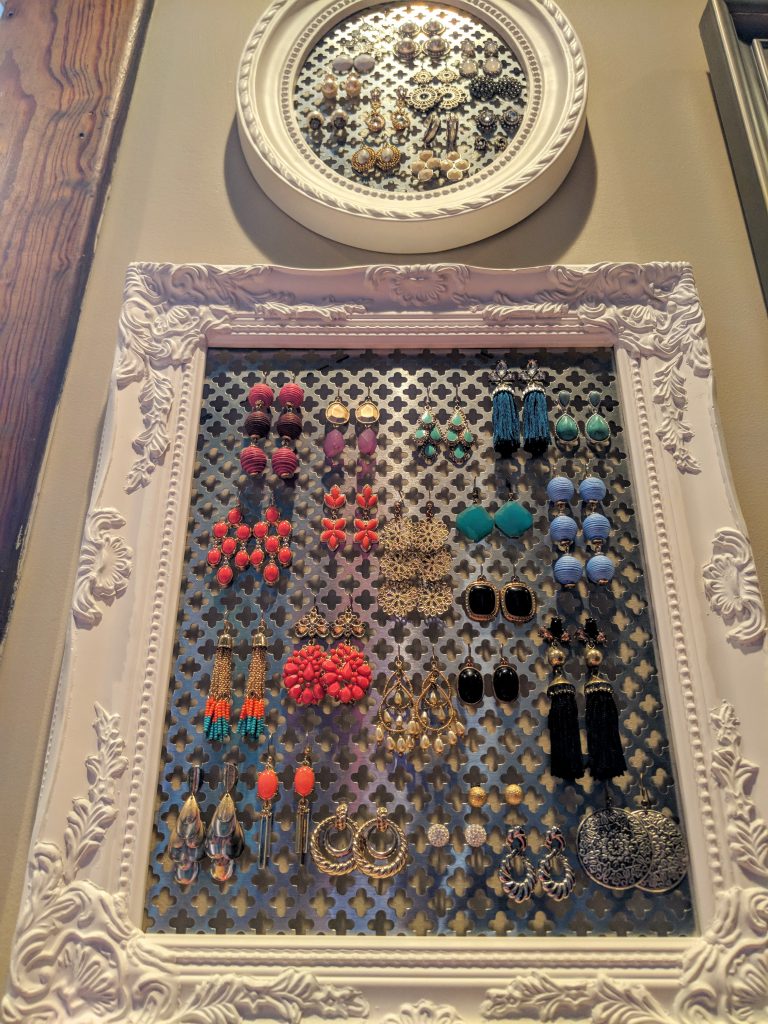
I adapted that idea to fit my needs and style by using slightly different materials. You can create this DIY earring holder with any picture frame. However, I opted for an ornate white frame, similar to the ones in this set. I favor pieces that have a museum-like look with chunky architectural detail. You can find these type of chunky open back frames at Hobby Lobby, on Wayfair, or Amazon.
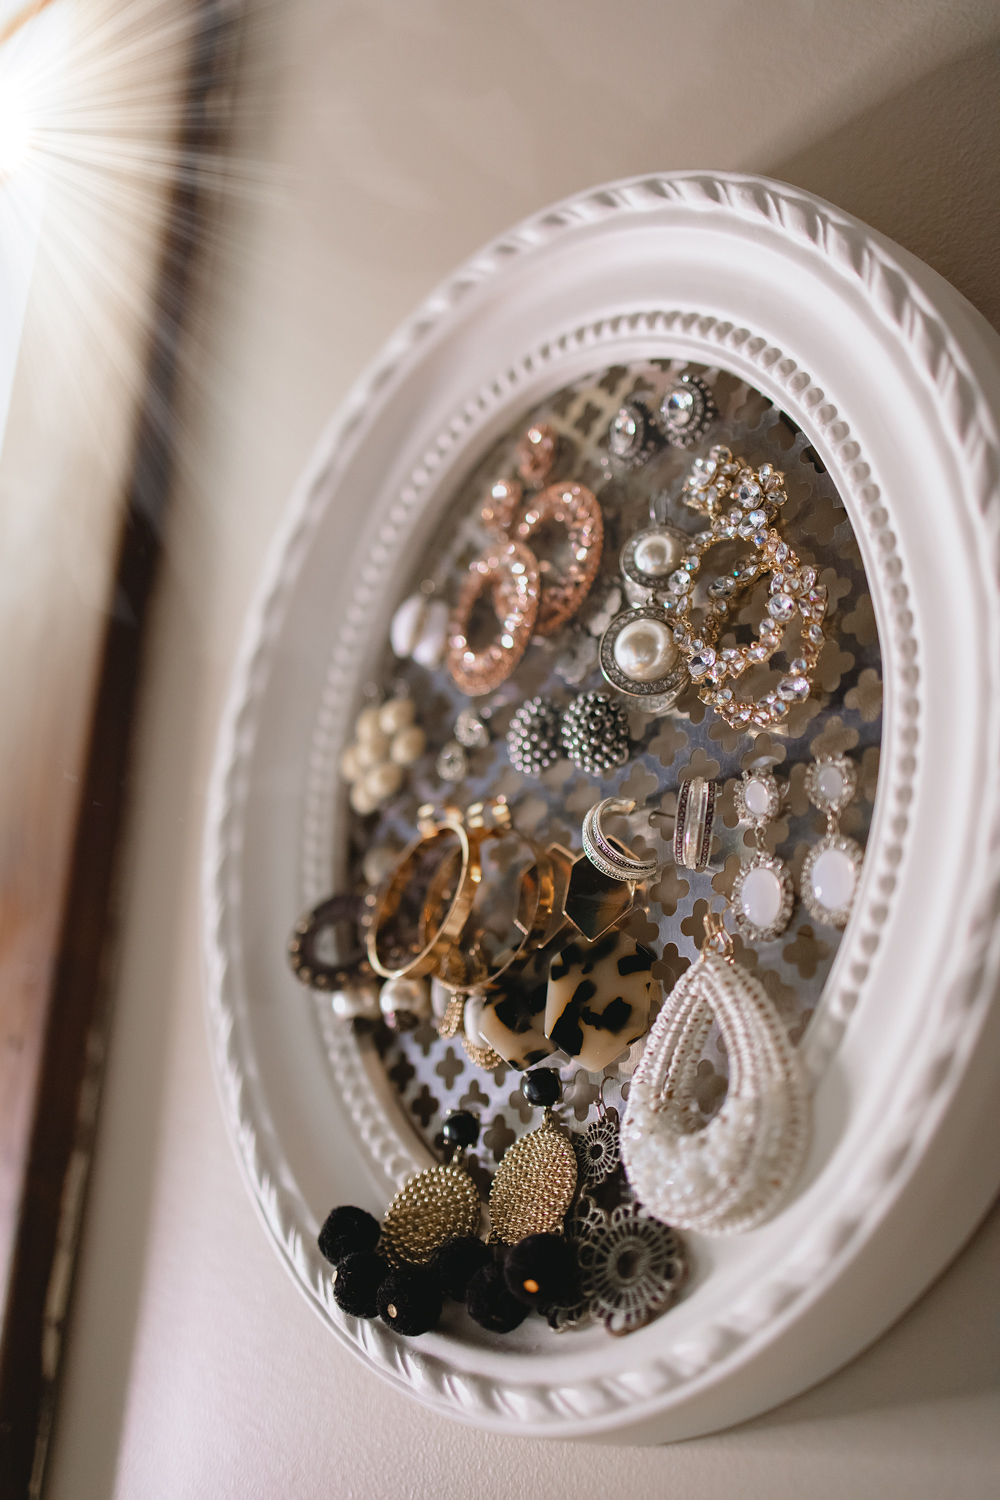
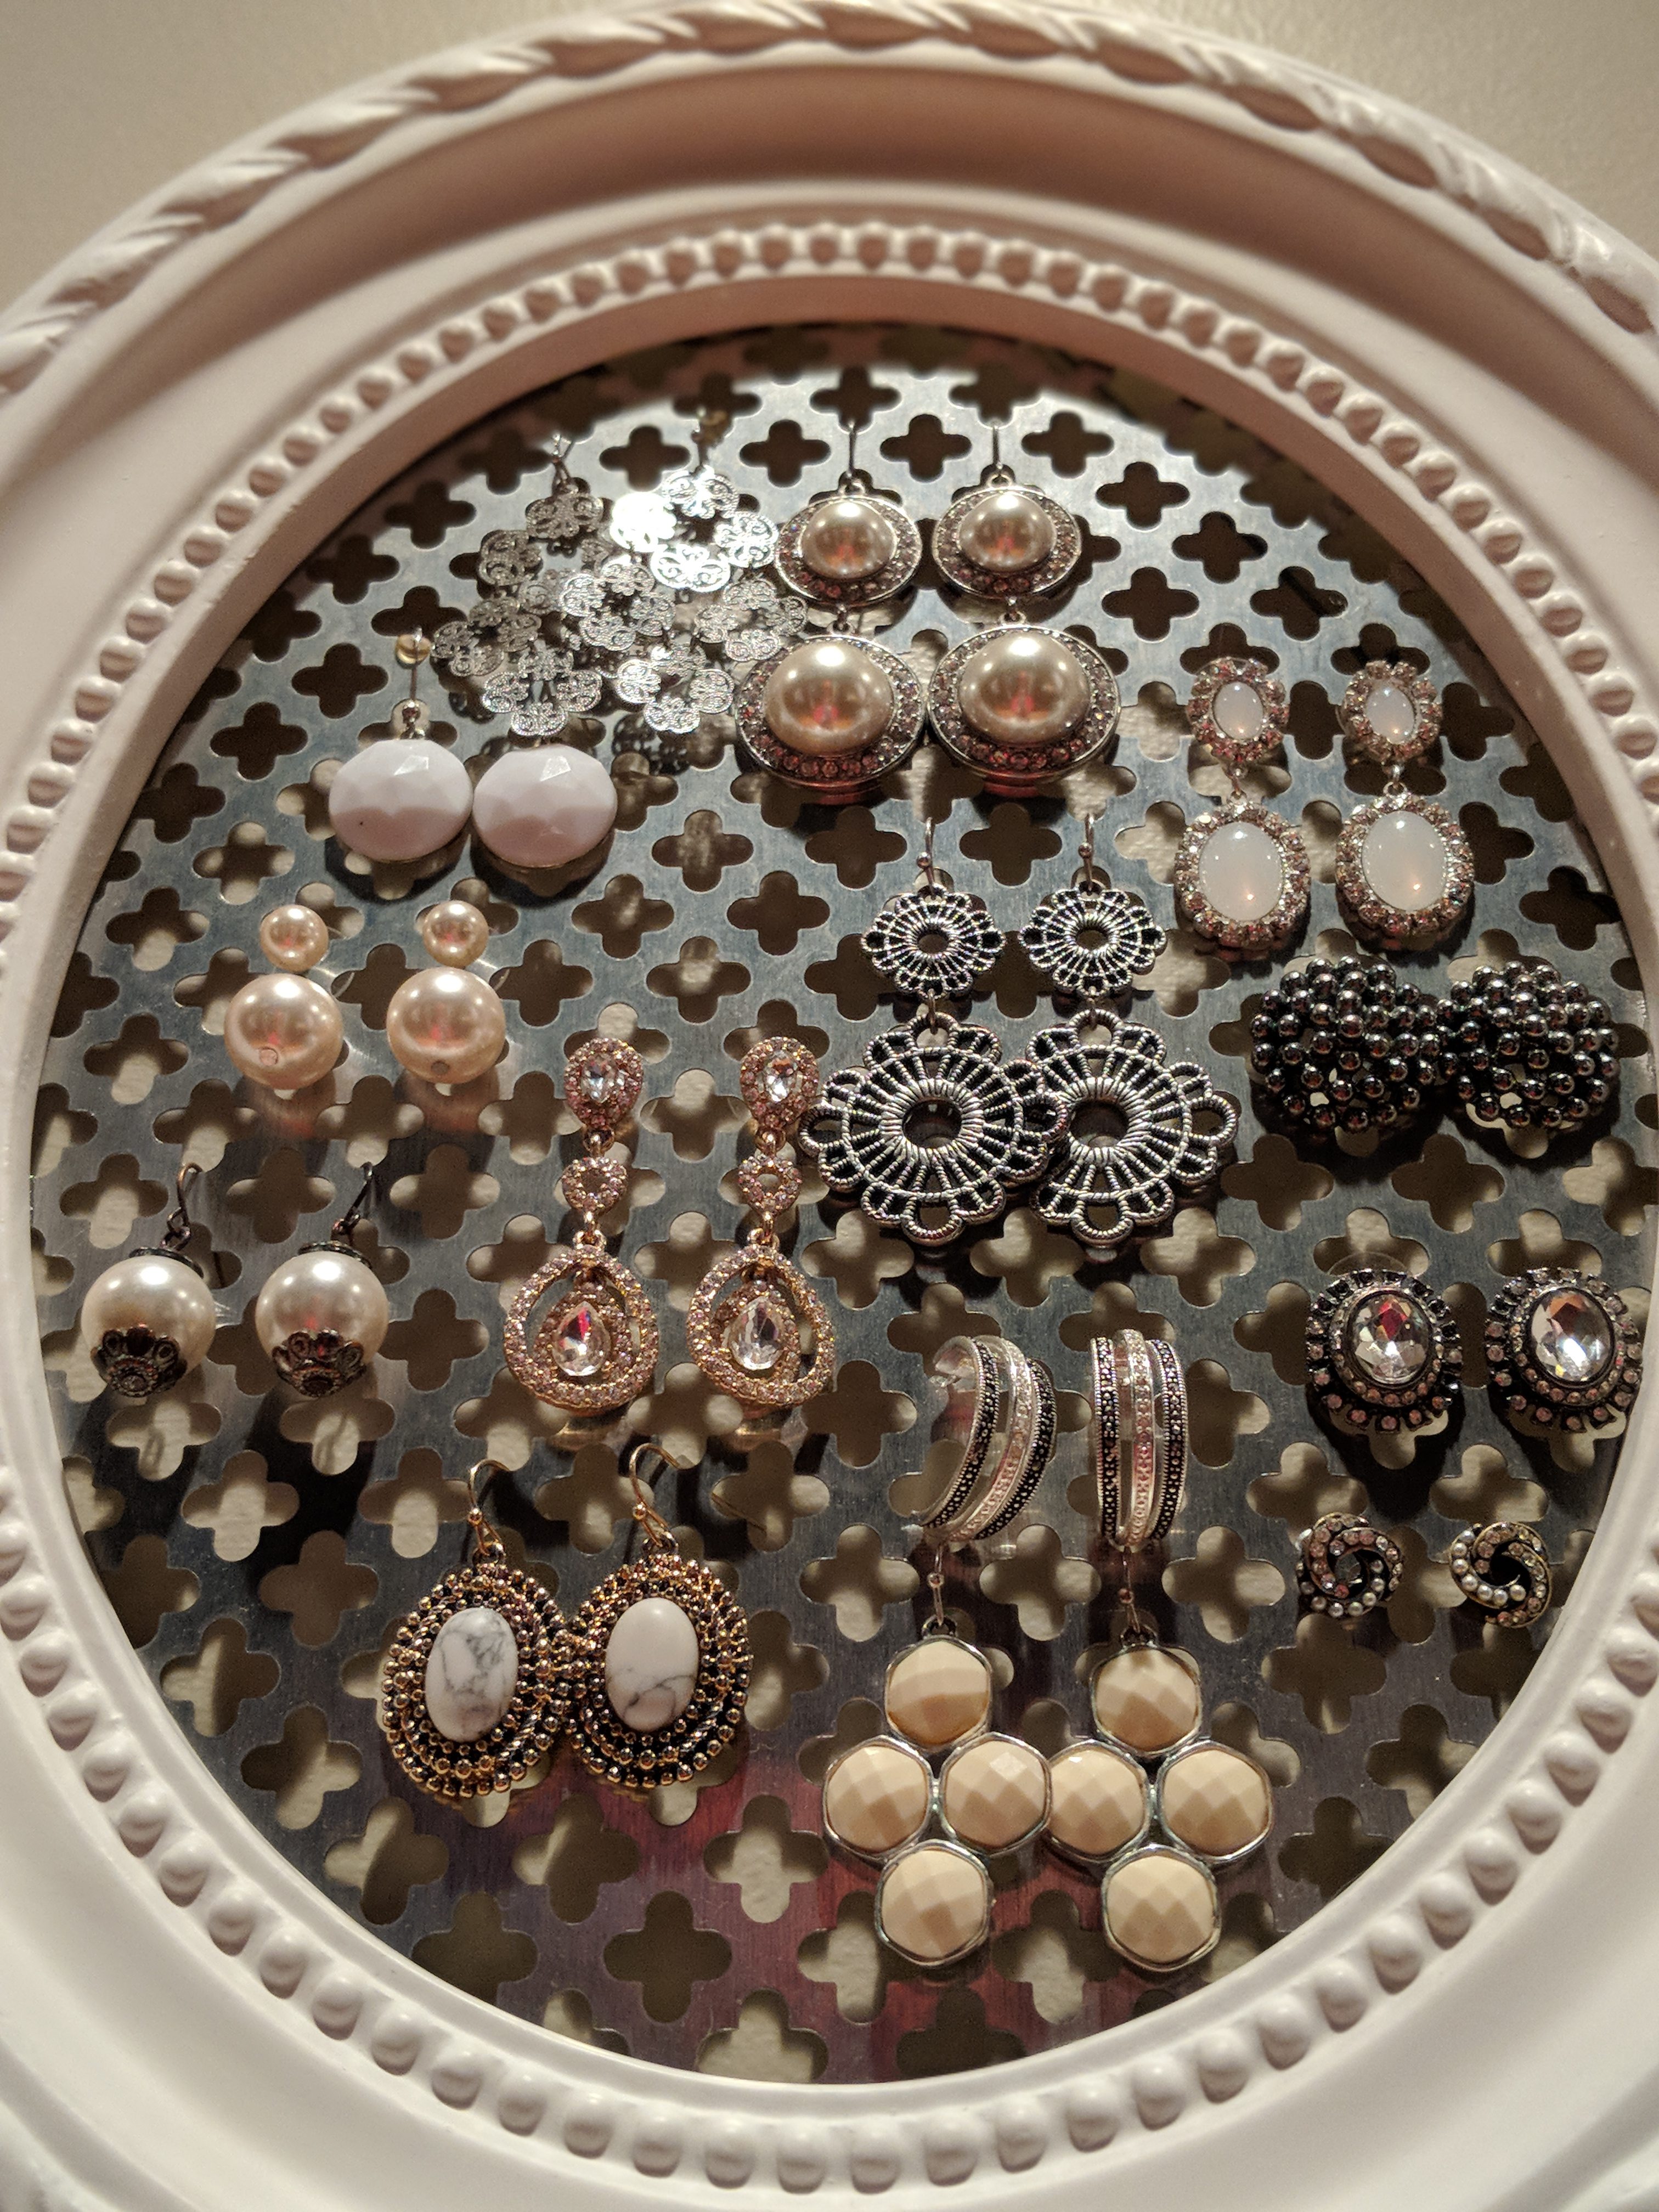
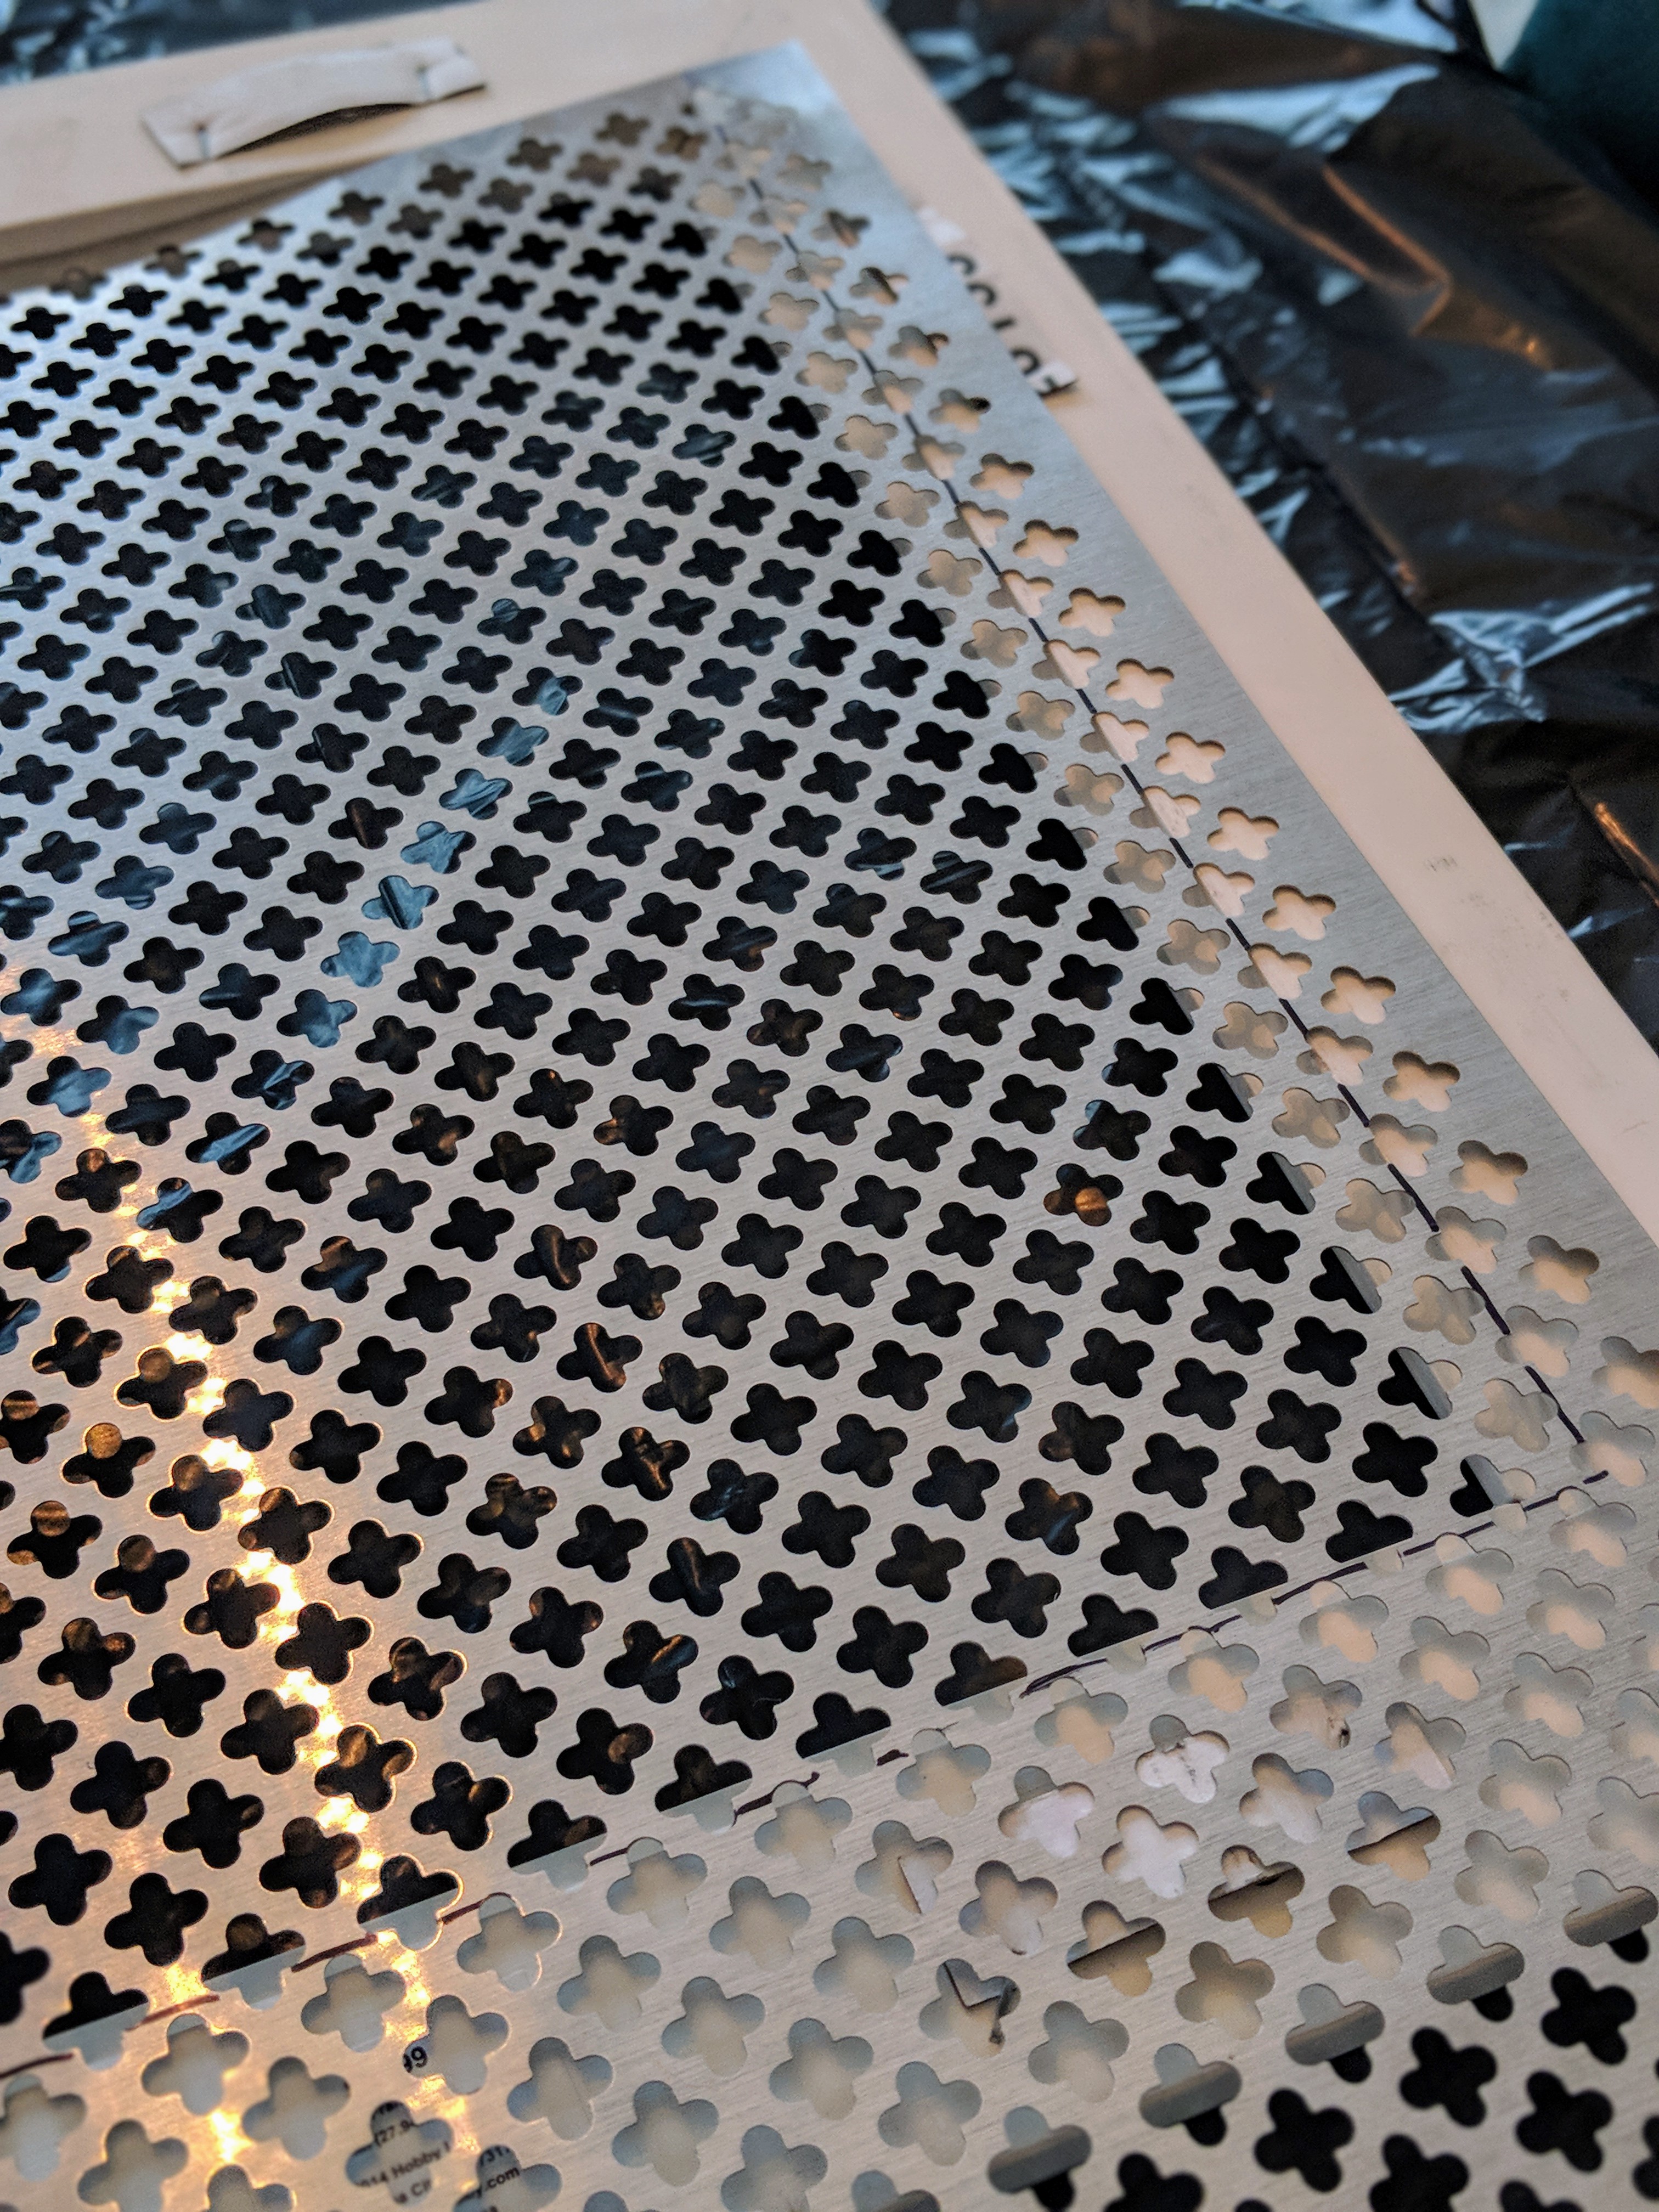
To add impact, I recommend purchasing more than one in a similar color or metallic finish. This creates a gallery wall of sorts. As for the frame’s inside, chicken wire was a bit too “farmhouse” and casual for my space. Consequently, I picked up this cloverleaf metal sheet instead. I also wasn’t sure how to affix chicken wire to my frame. The metal sheet appeared like it would be easier to work with.
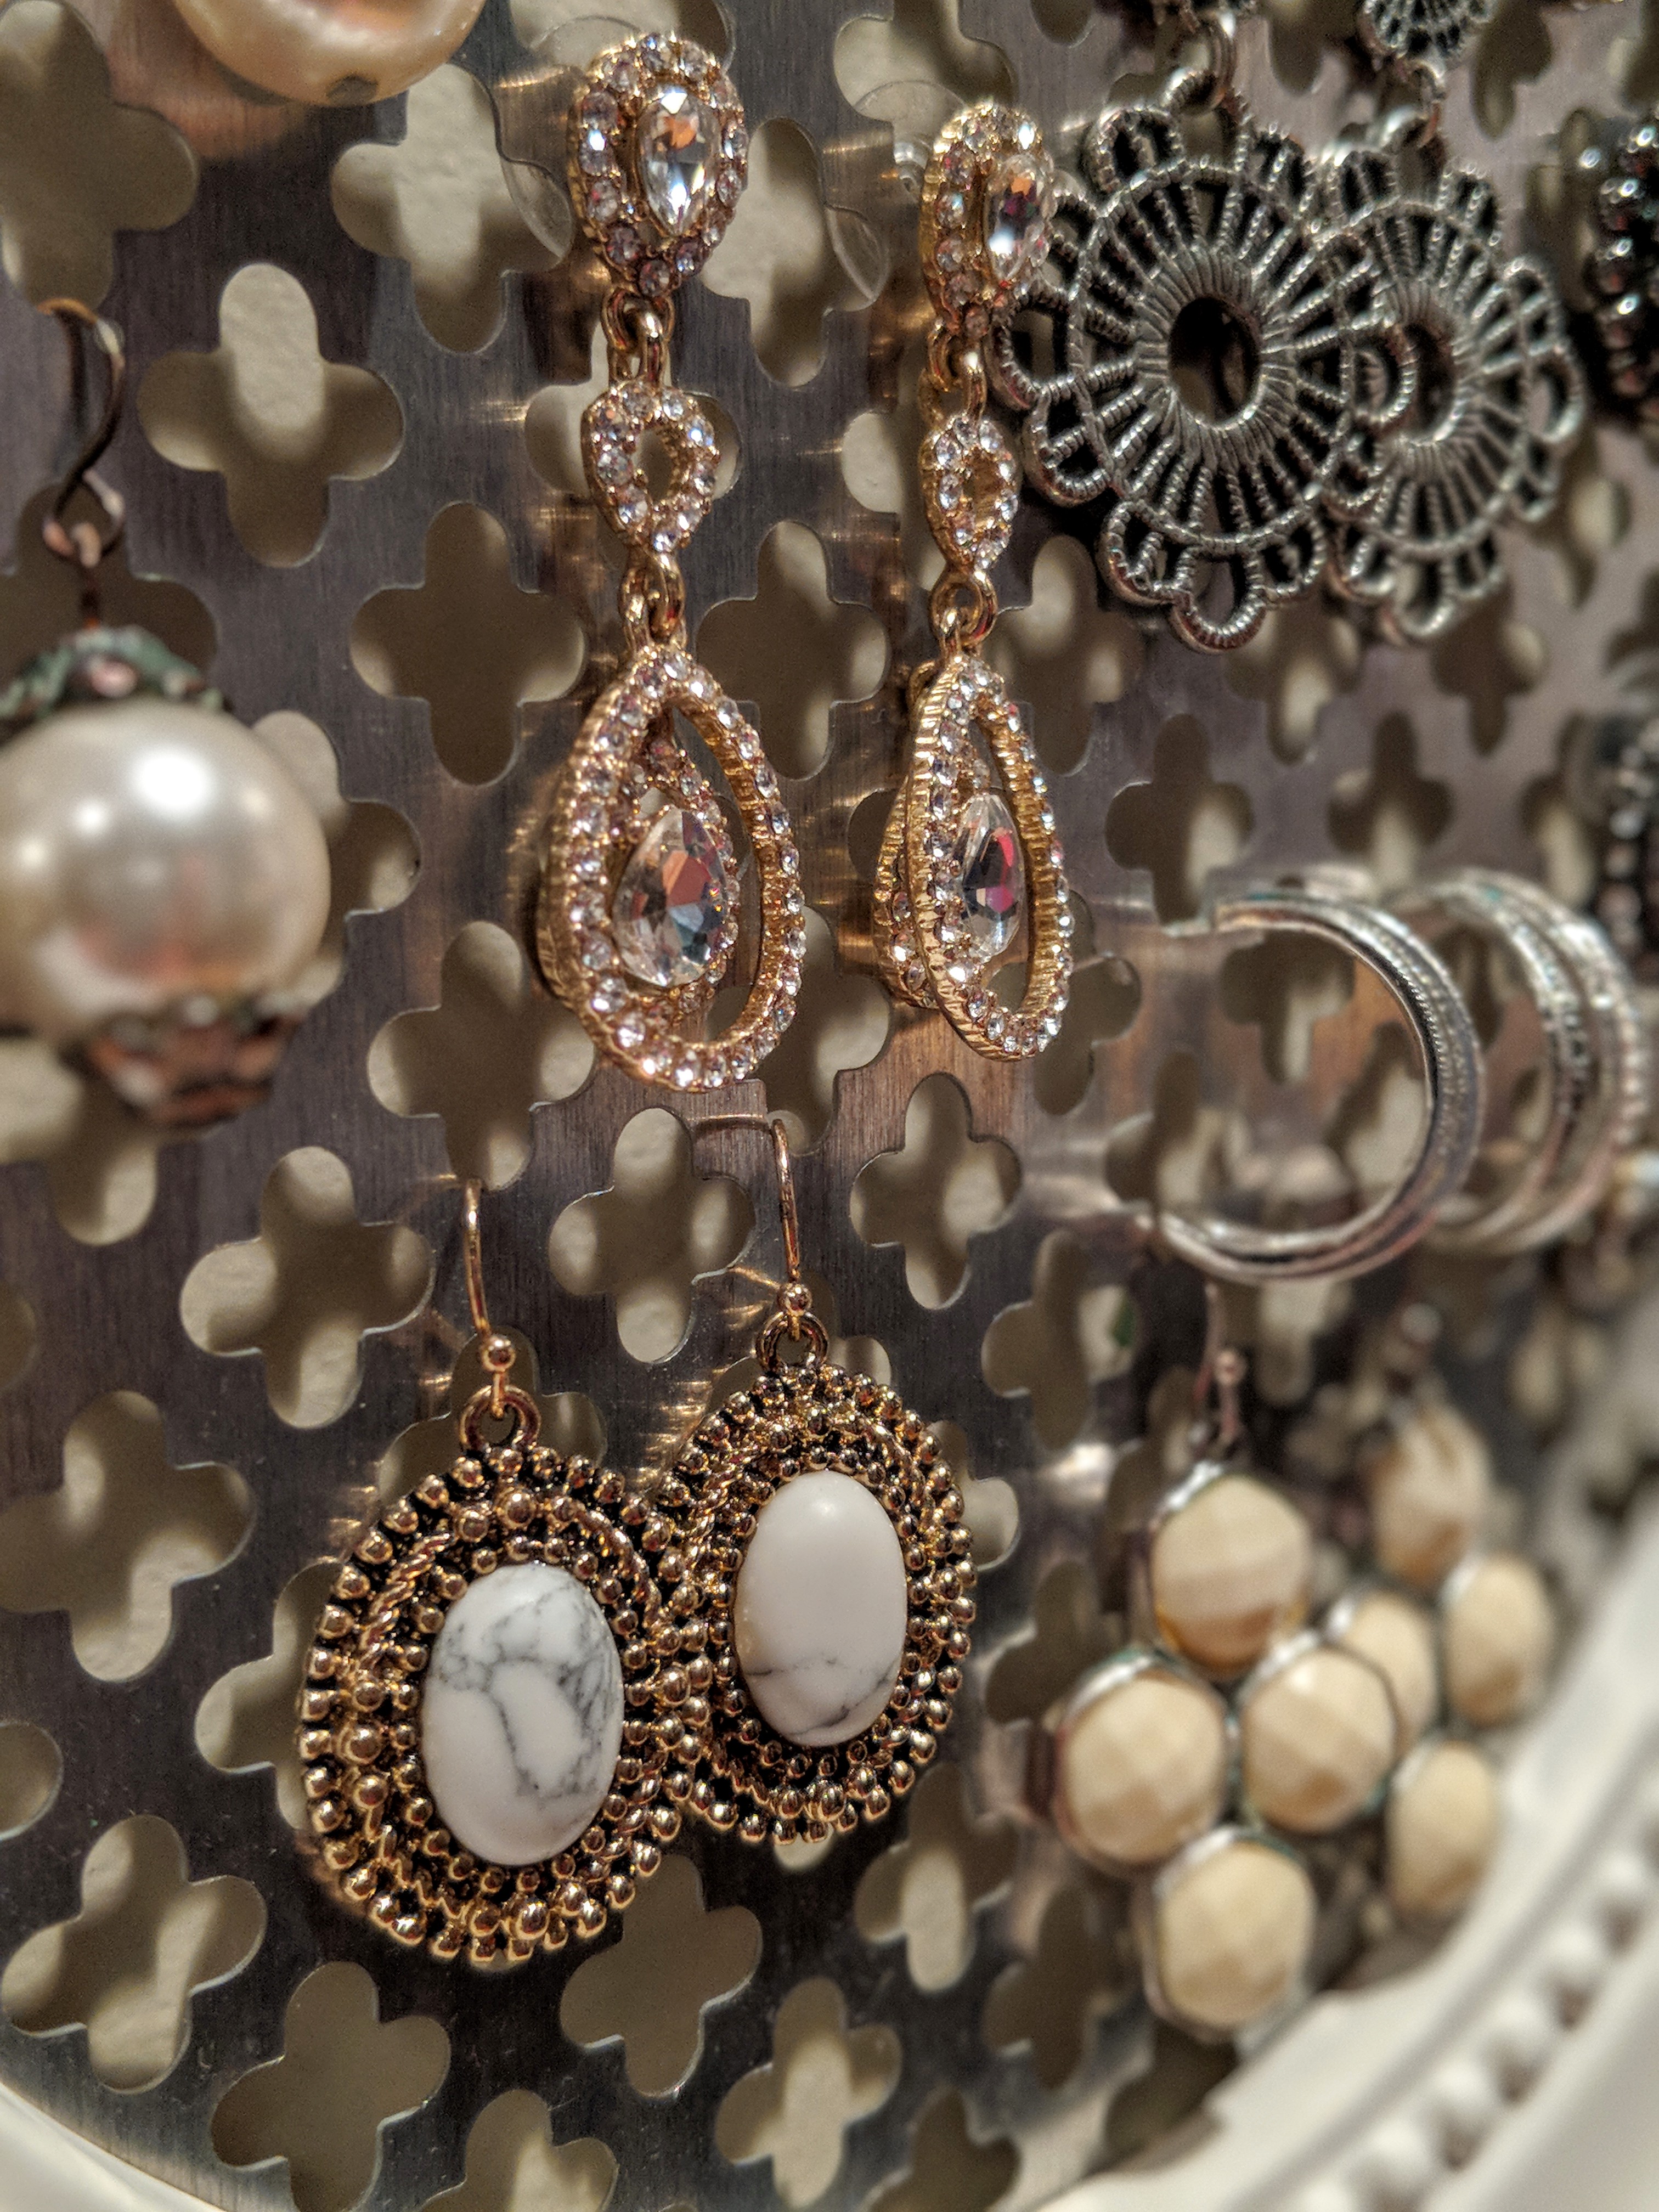
It ended up being a great choice because the clover detailing hooks earrings really well. You can even display studs with this piece. I don’t think that would work as well with chicken wire.
DIY Earring Holder – Materials List
What you’ll need:
- Cloverleaf aluminum sheet
- Open back frames
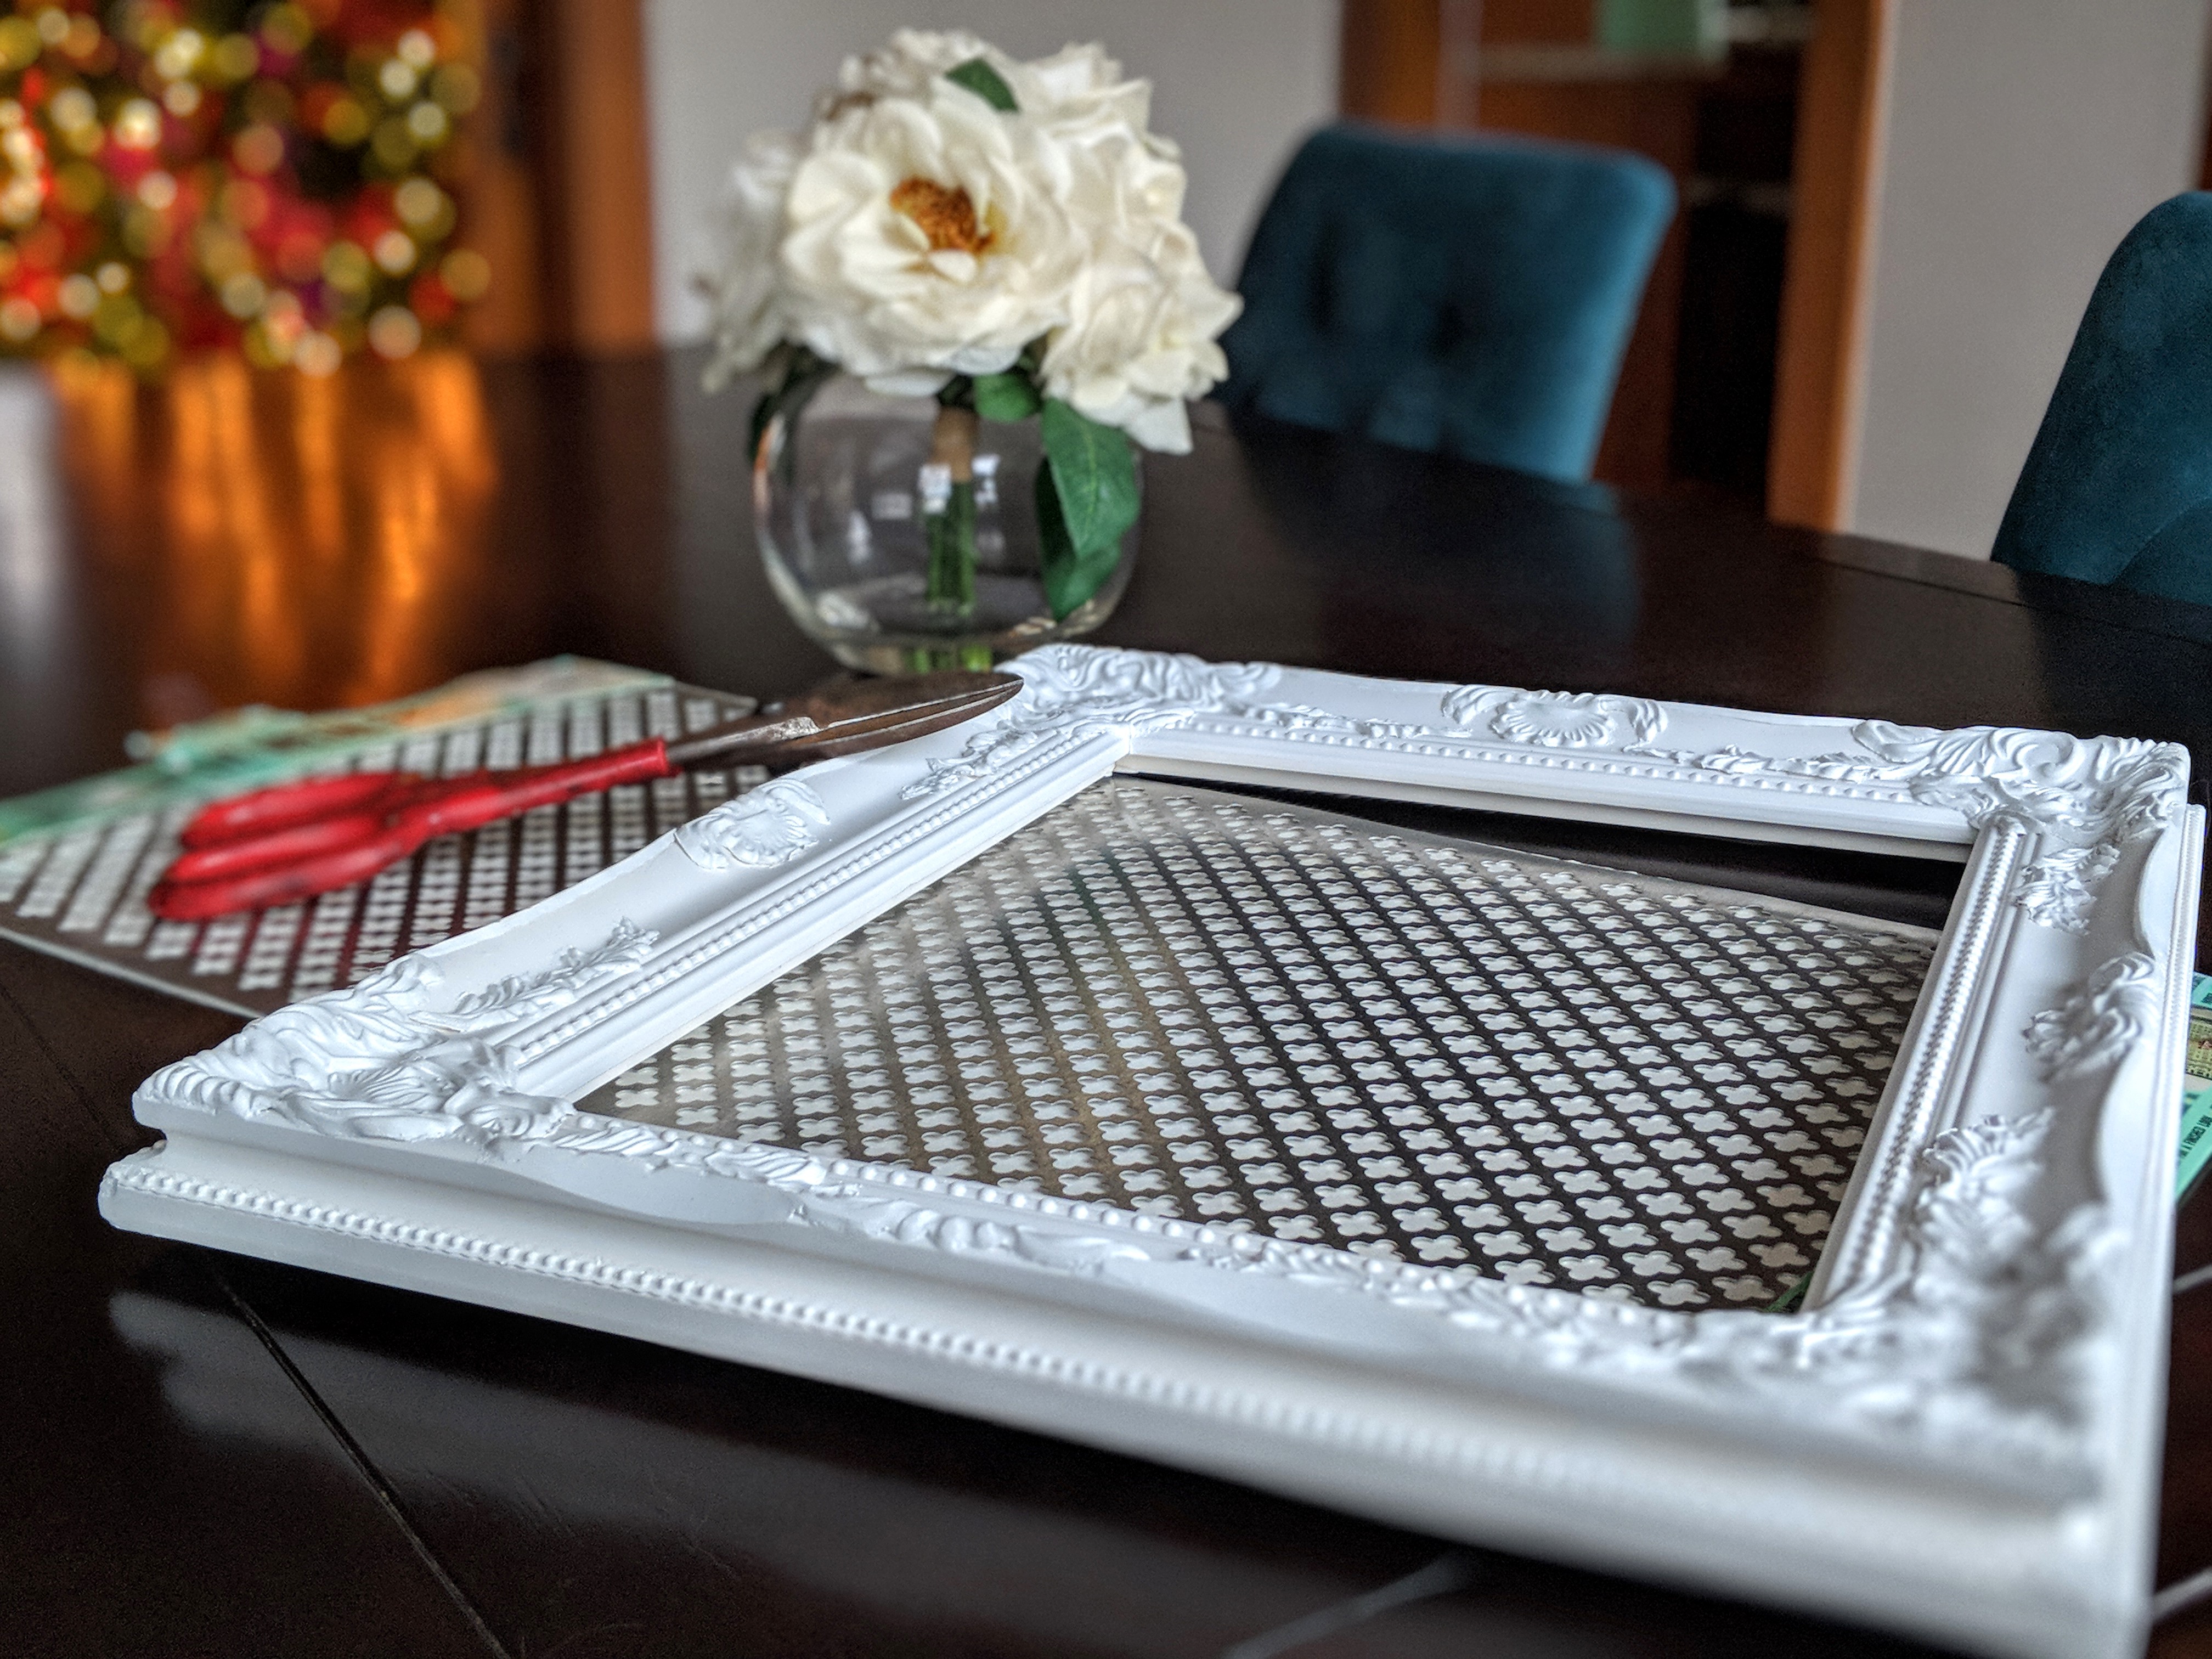
- Tin snips (Vital: Do not try this project without tin snips)
- Super glue
- Sharpie Marker
Earring Holder Directions:
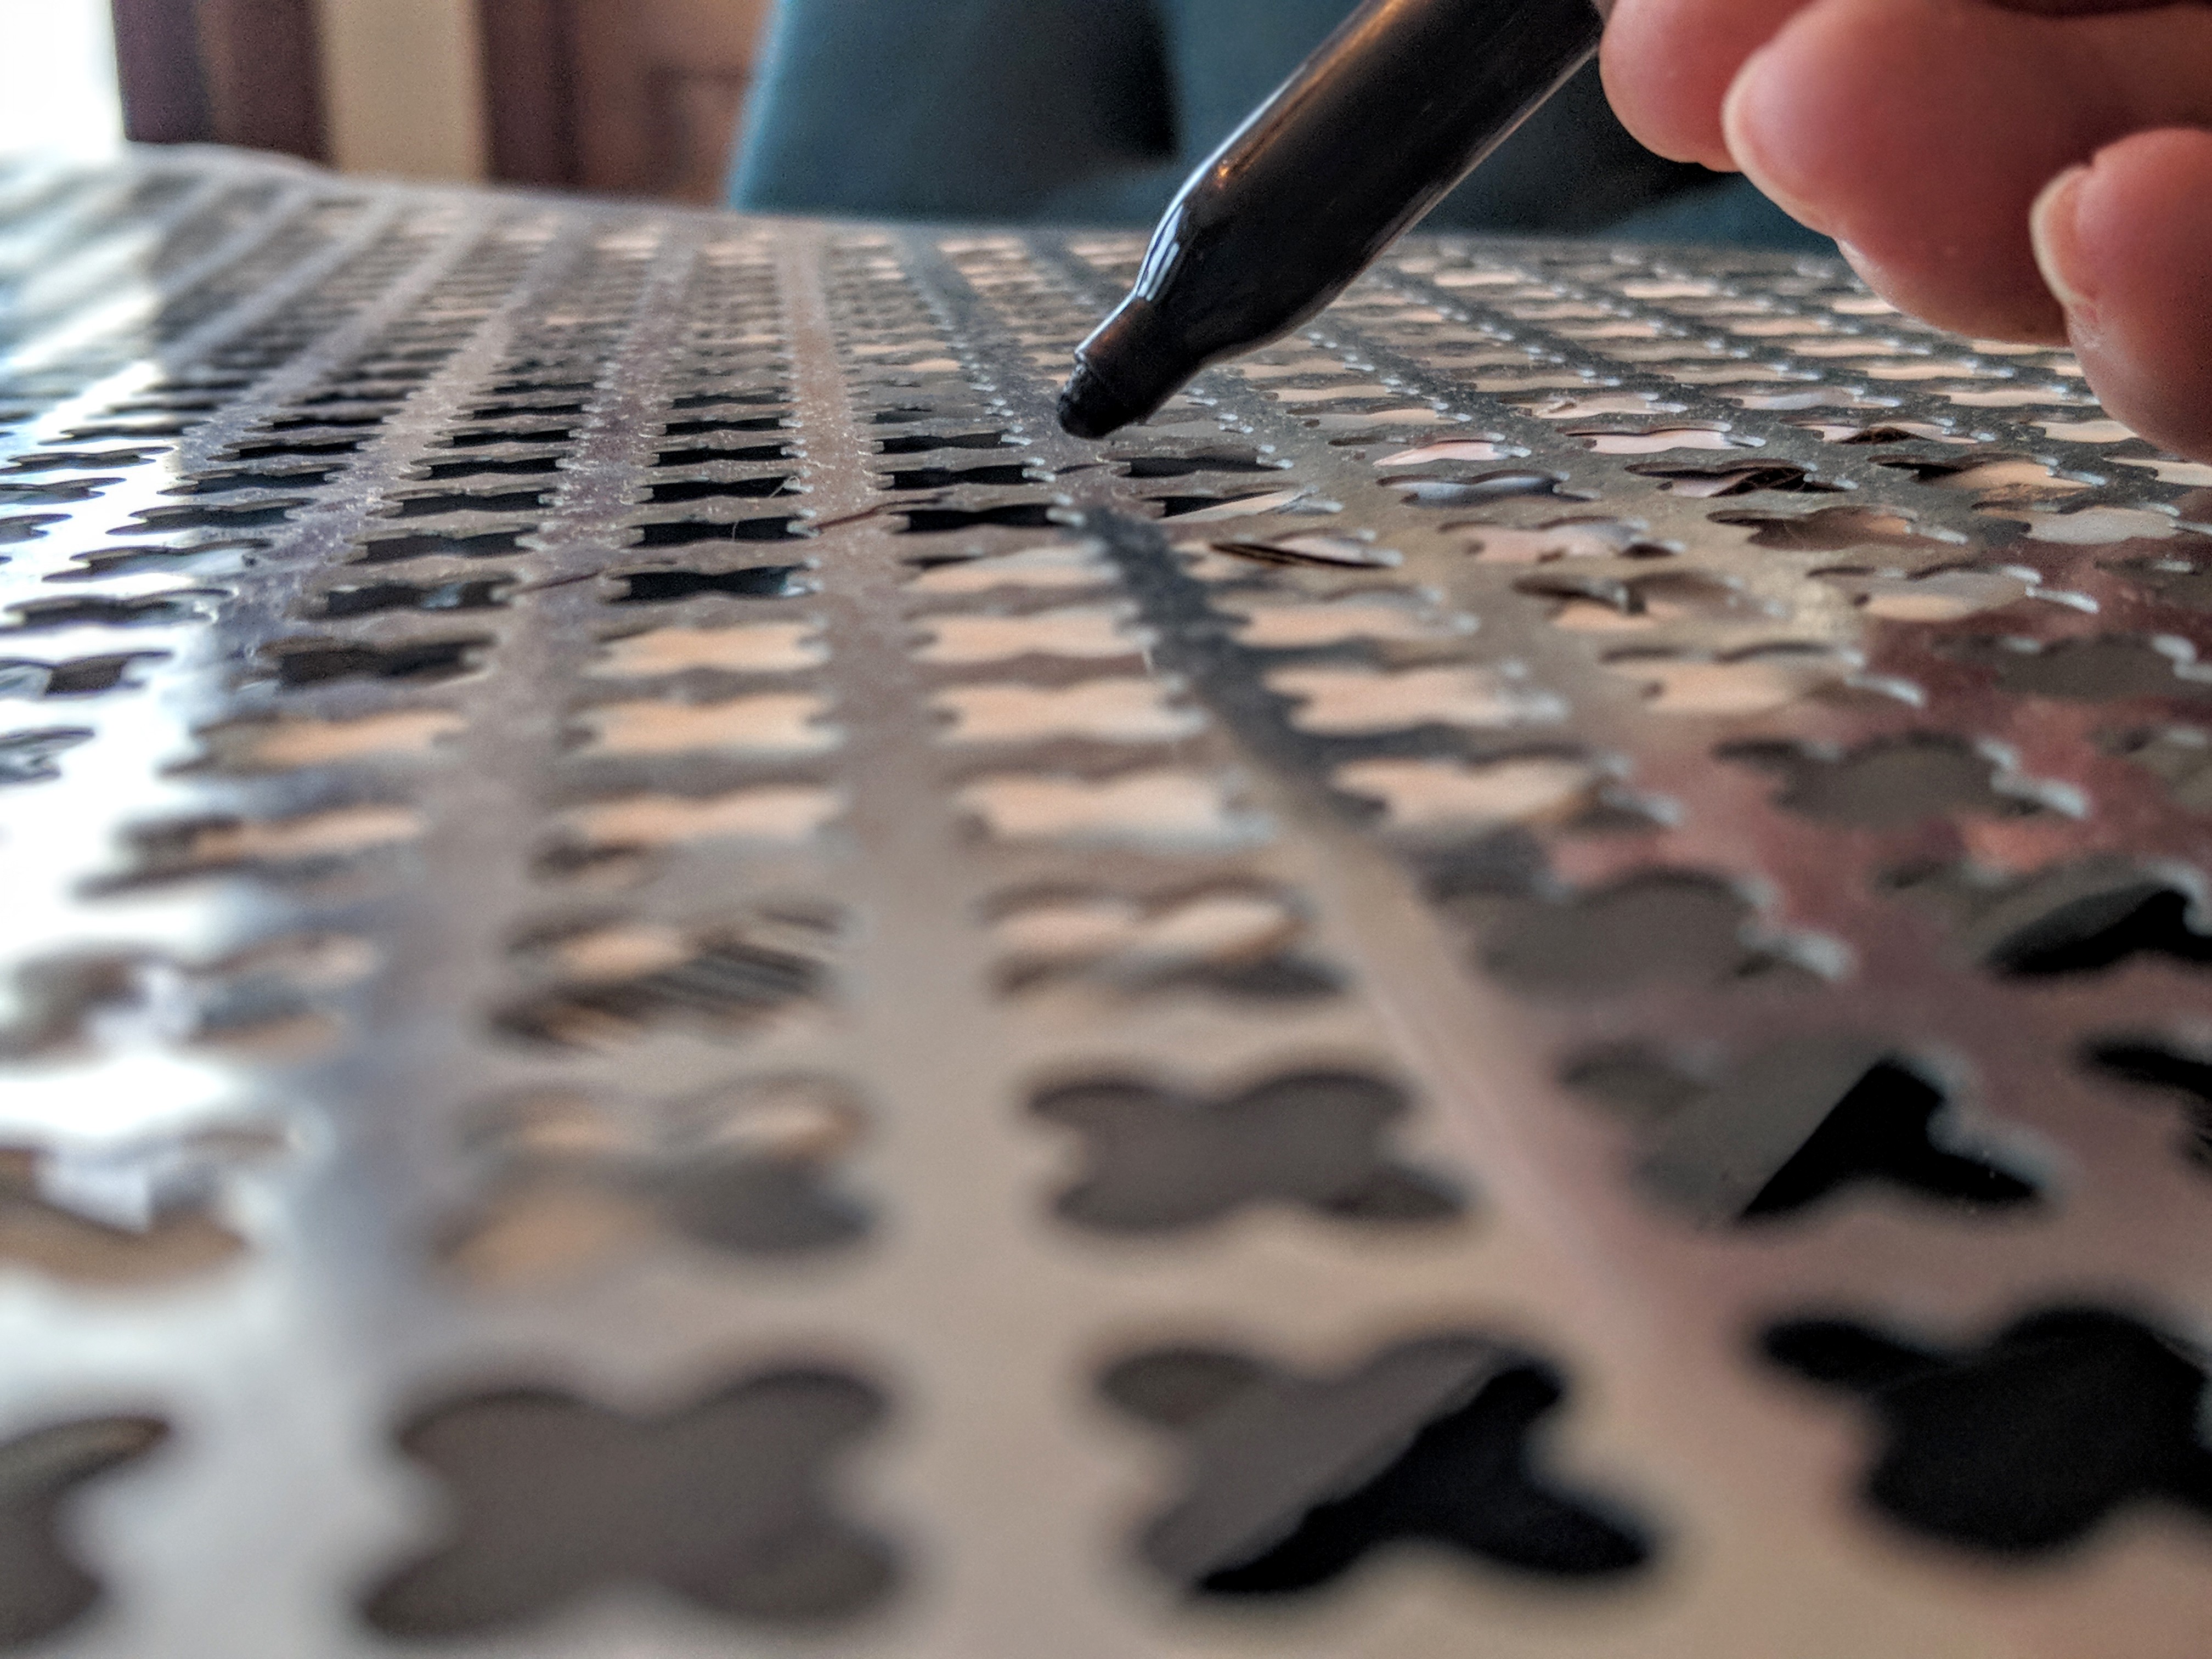
Place your frame upside down. Put the metal sheet on top of the frame. Use a Sharpie marker to trace the edge you will be cutting. Your goal is to have the metal sheet sit inside the open frame, where a picture would go.
Use your tin snips to cut along the edge you just traced. Tin snips make the metal very easy to cut. I was worried I would not be able to trim through the metal, but because of the tin snips, it was not challenging at all. This was my first time working with tin snips.
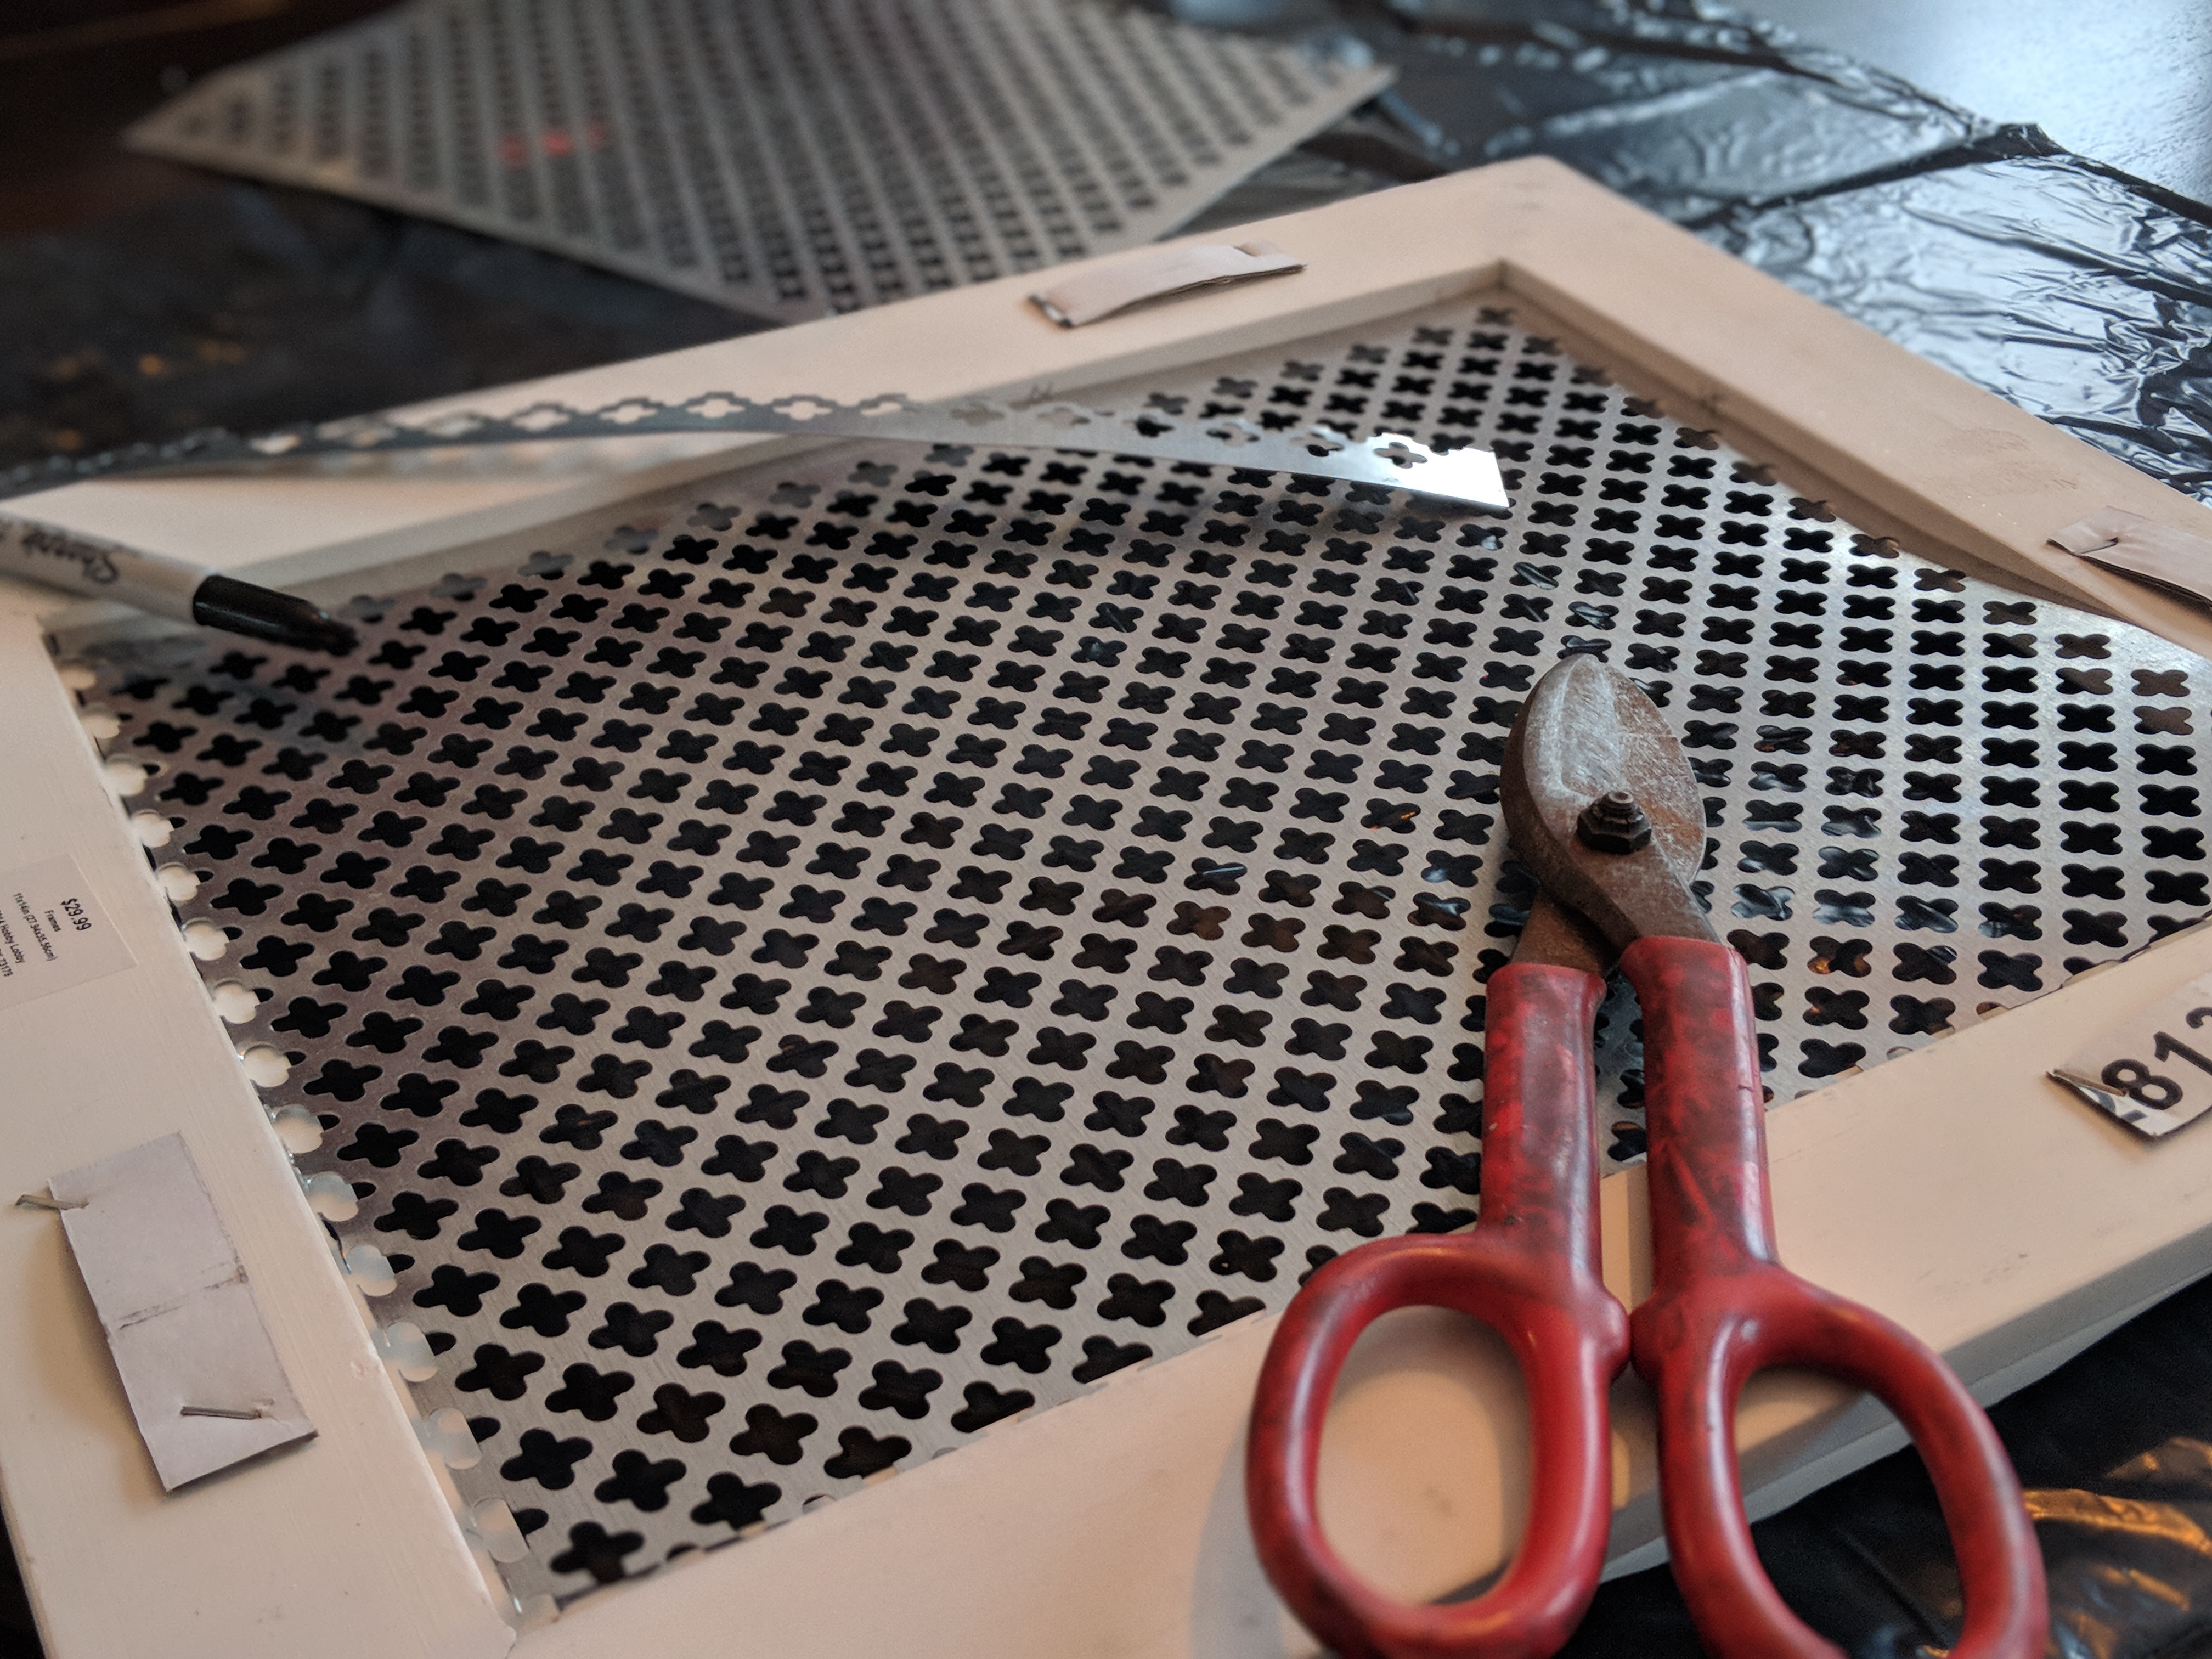
Once you have your metal cut, make sure it sits nicely in the frame. Trim down any areas if necessary. You want a good, clean fit.
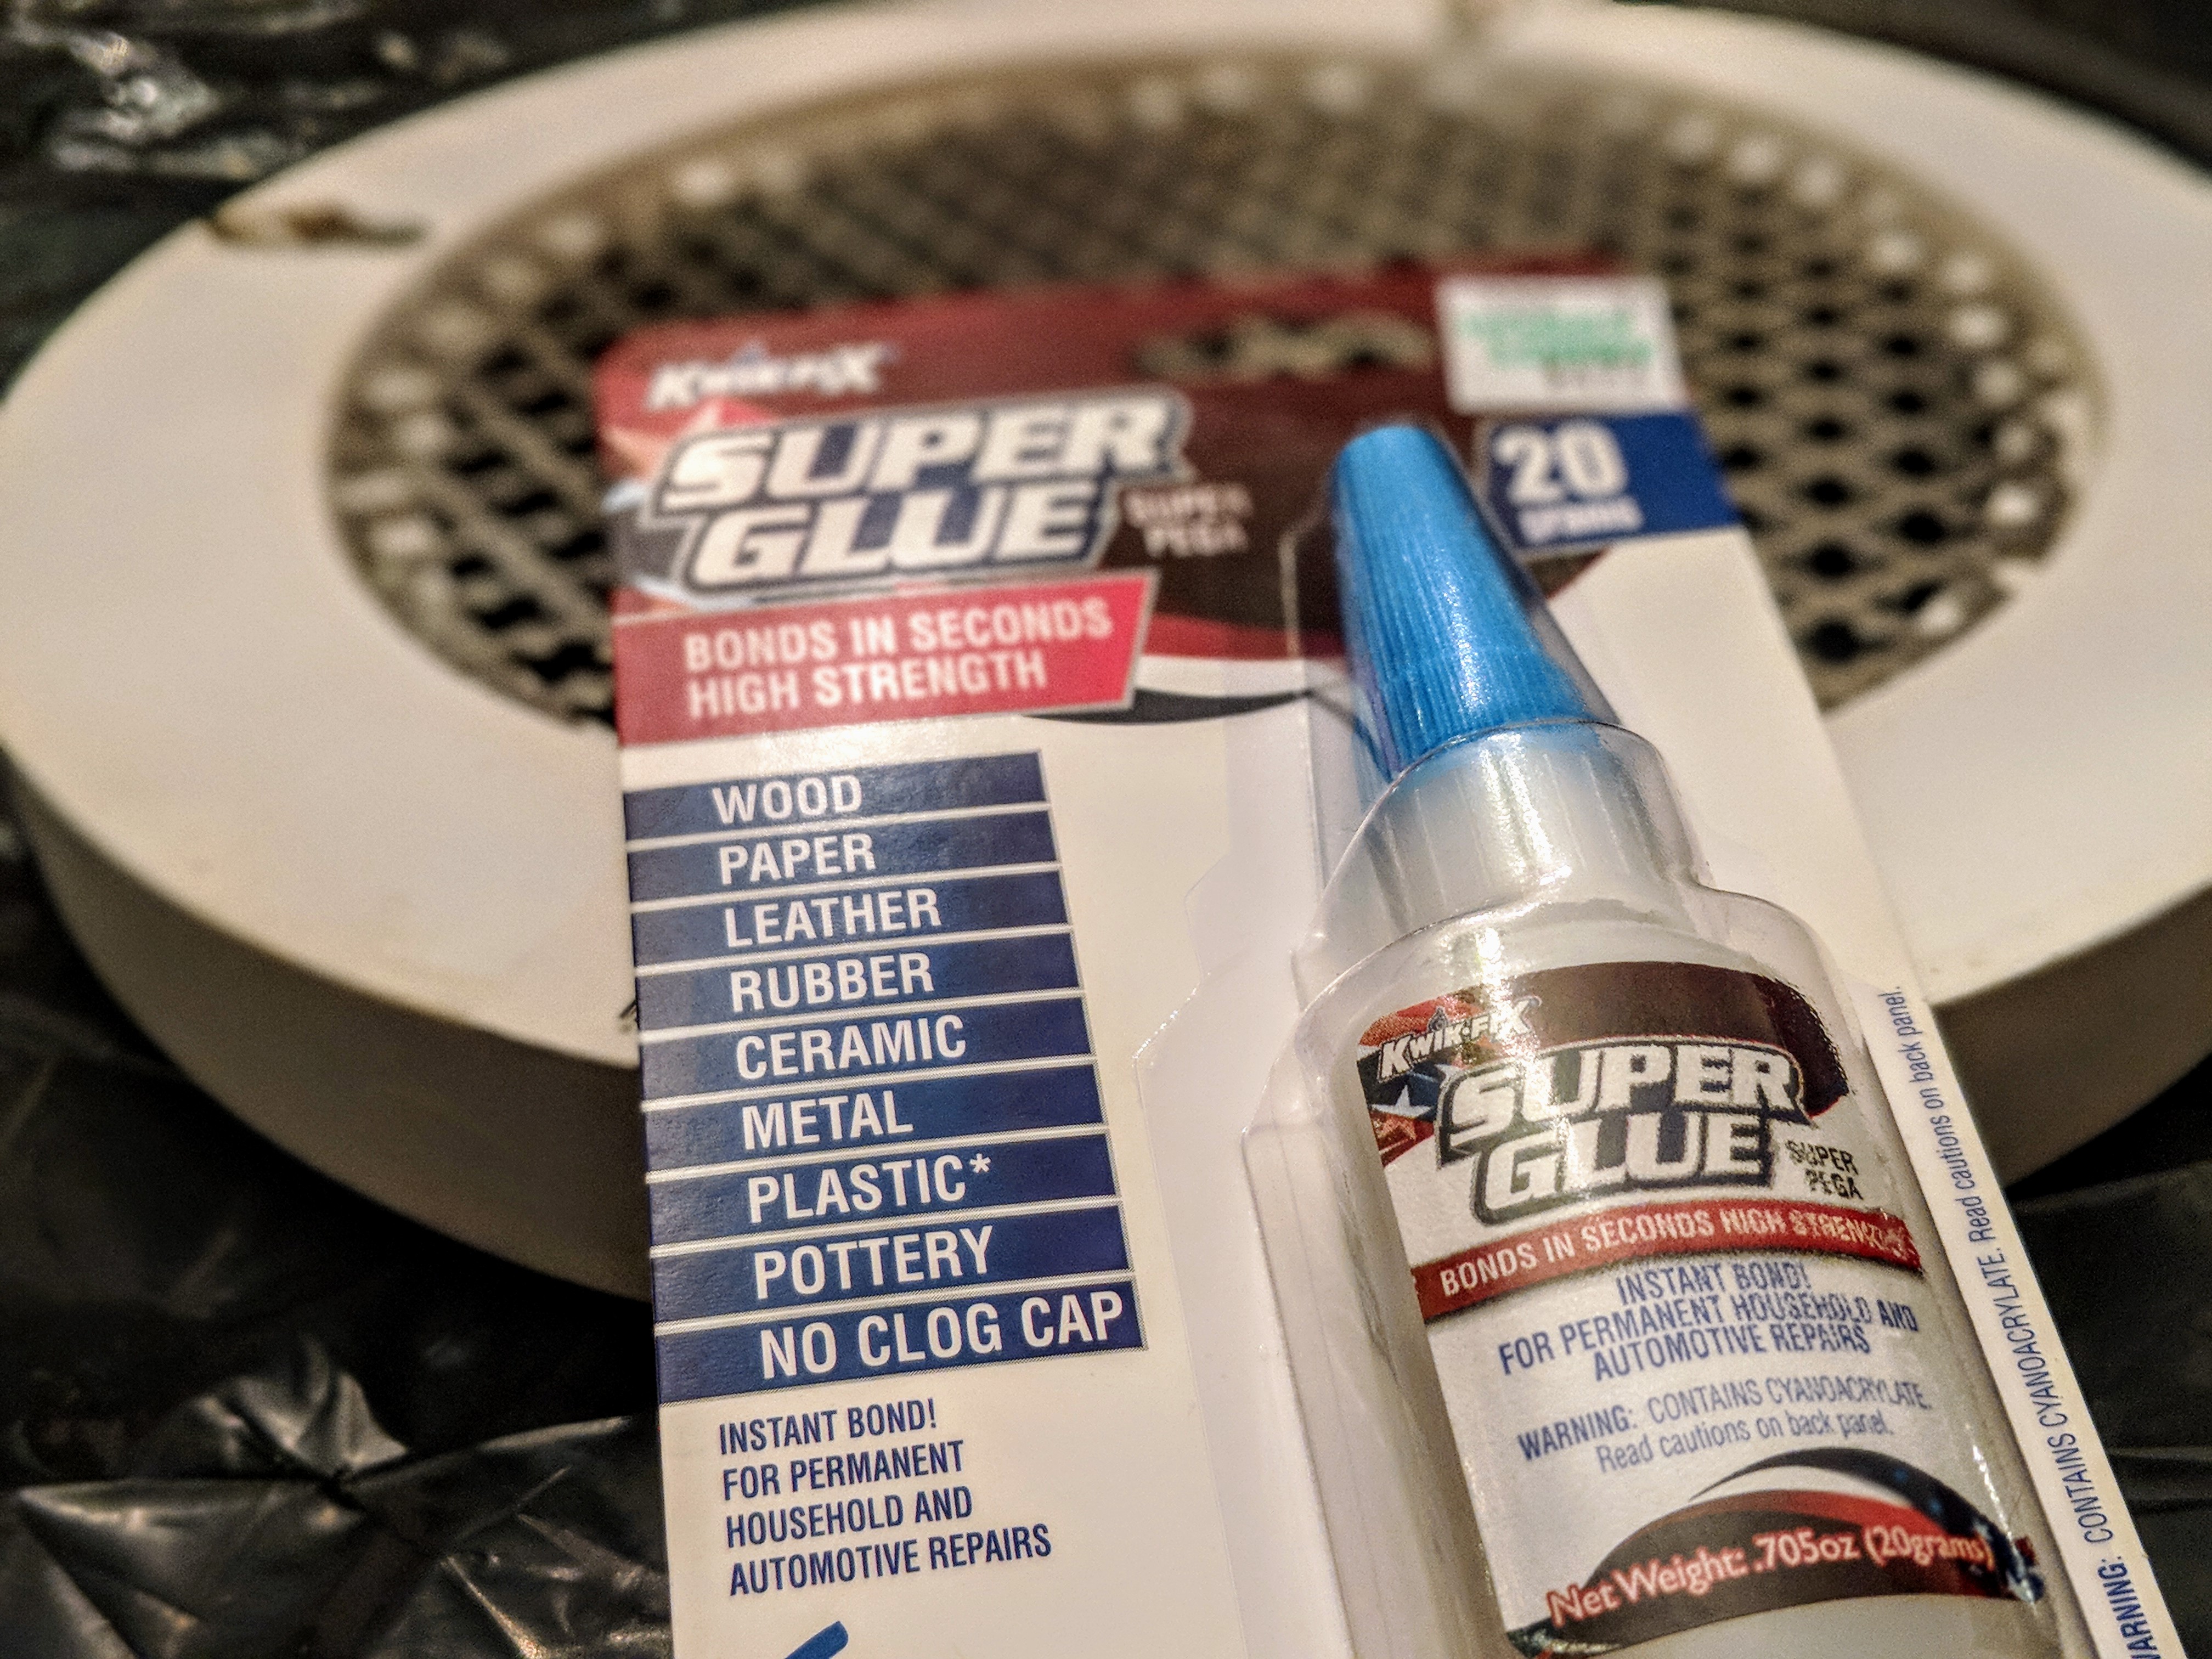
Next, you will use the super glue to affix your metal to the frame. Hint: Don’t use too much glue. At first, I thought the more glue, the stronger the bond. I actually made it more challenging by using too much glue. A few dots (scattered evenly and all the way around your frame) is all you need.
Press and hold the sheet to your frame for at least 10 seconds. After that, the glue should be bonded. To be on the safe side, let it dry for at least a half hour before testing your frame out. I used several hardcover books to put additional pressure on the bond.
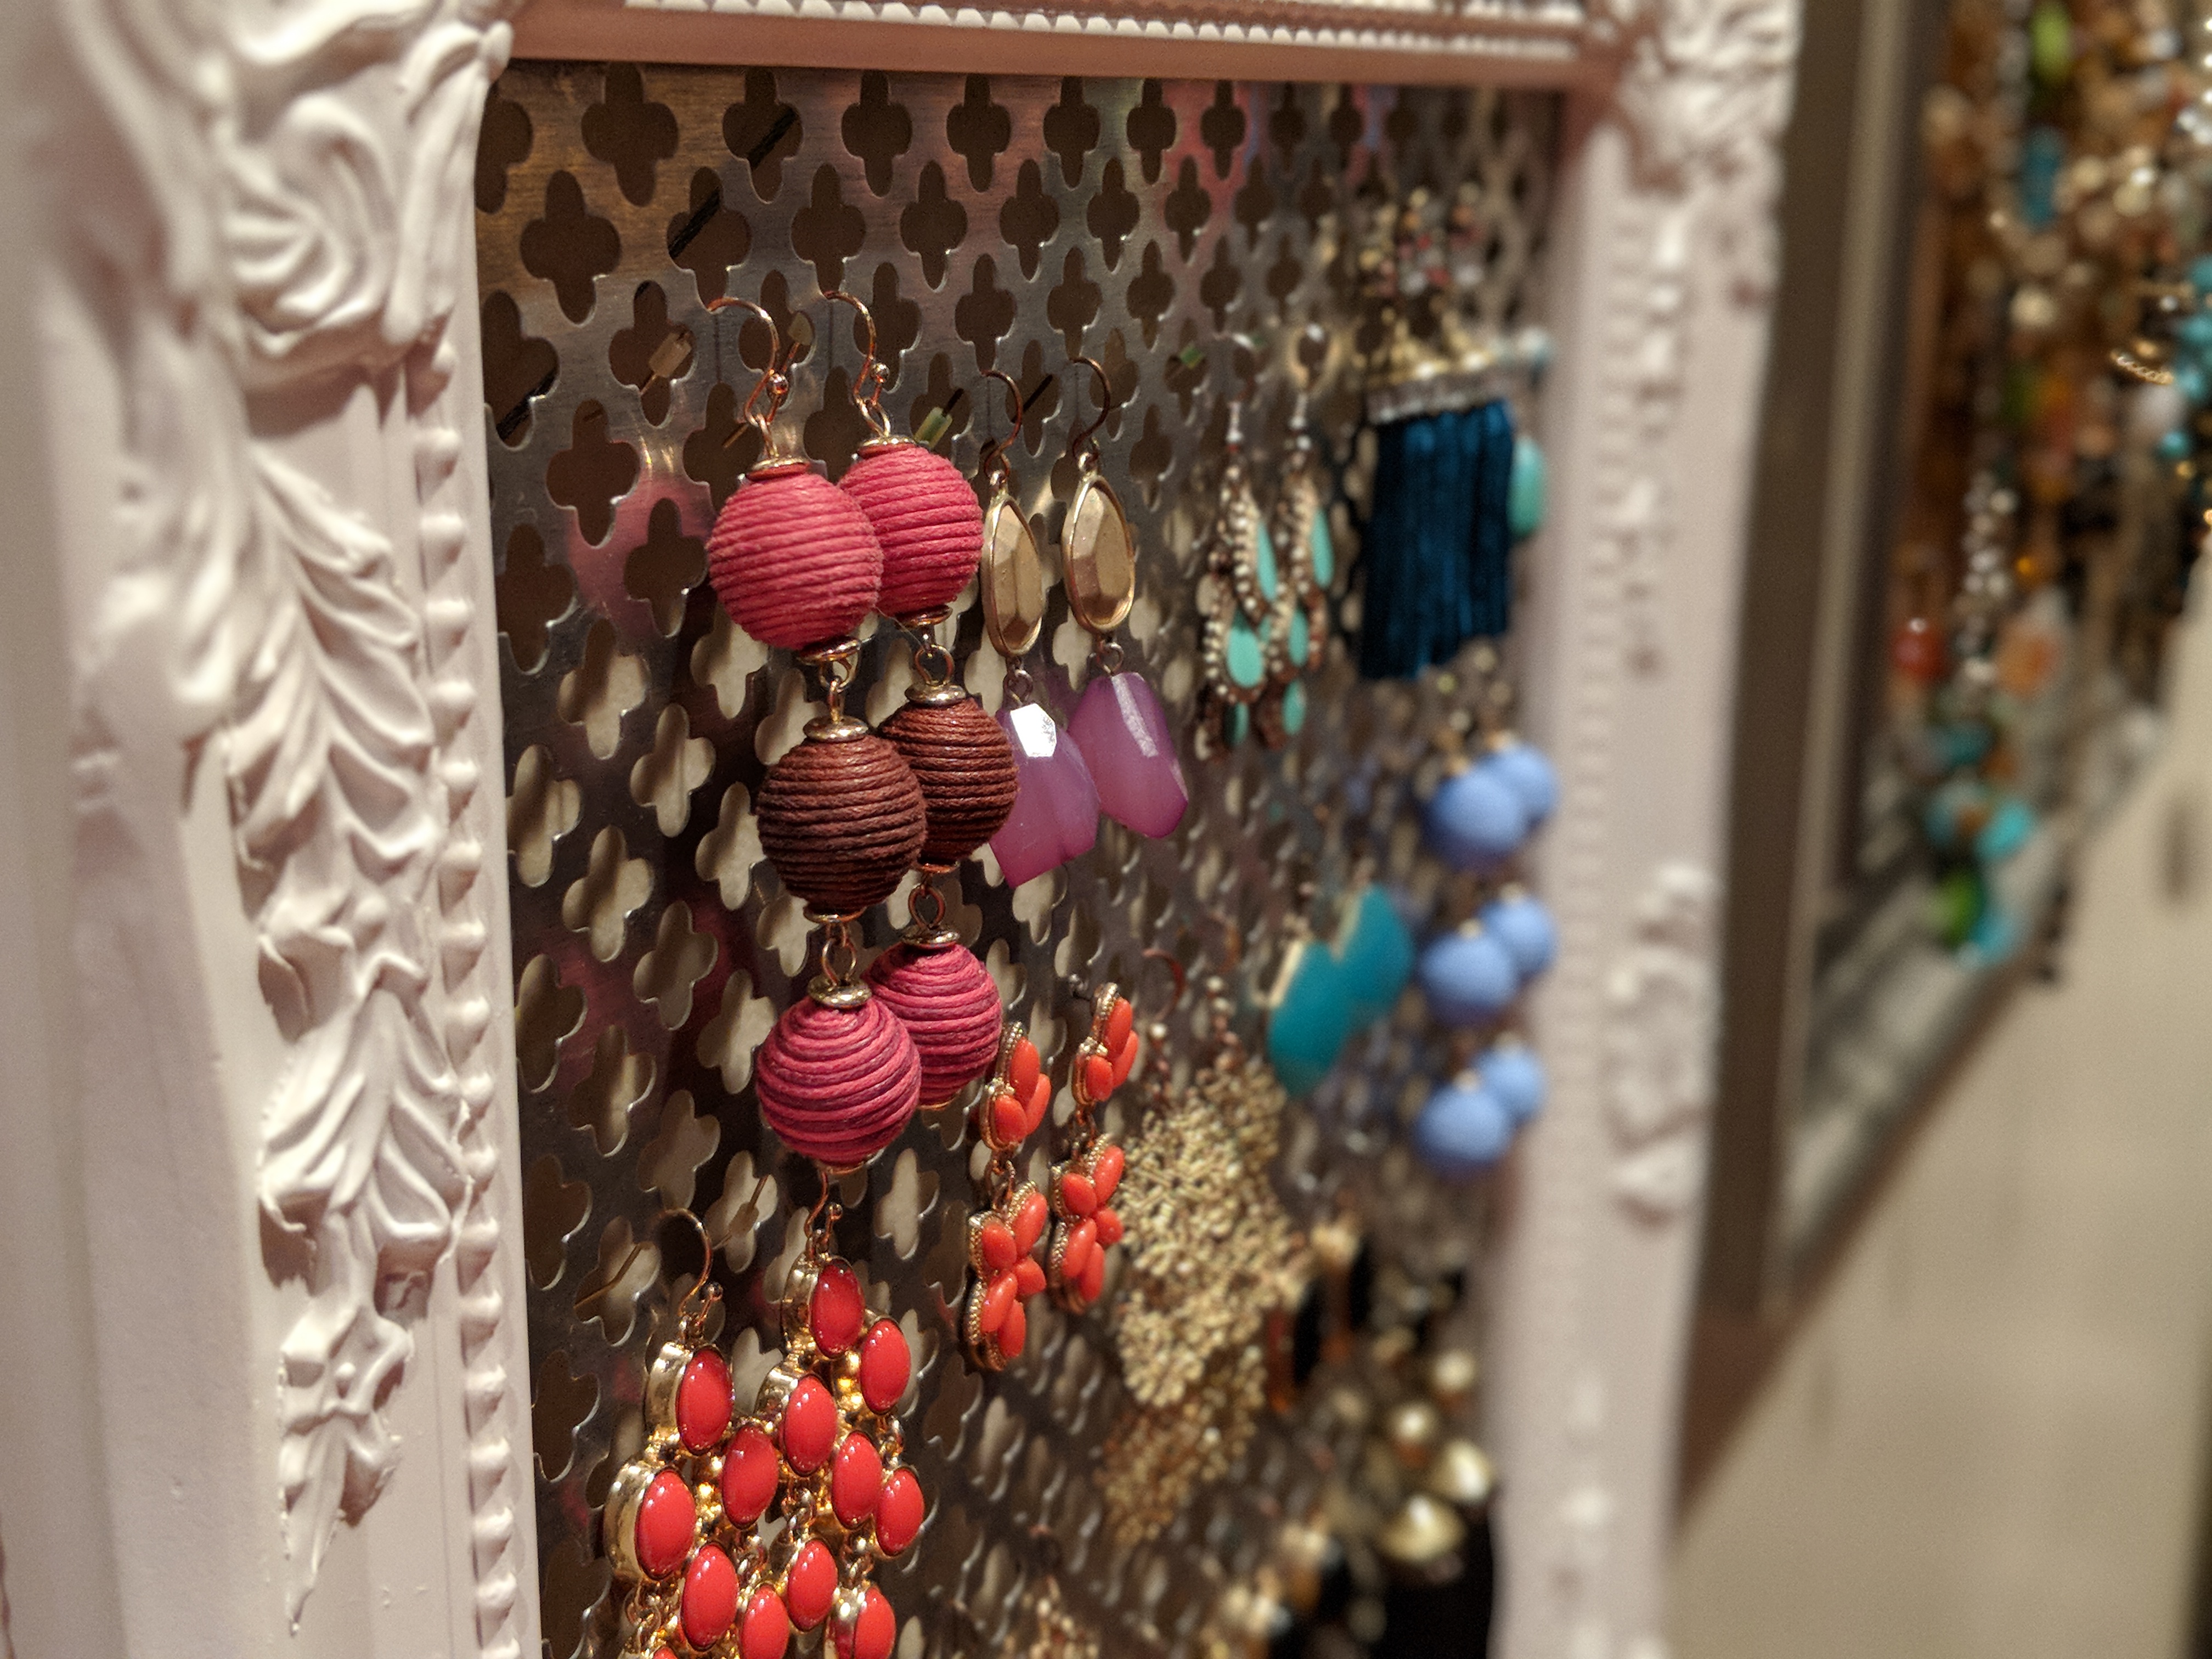
Now, comes the fun part! Hang your earrings on your lovely new earring holder and enjoy. This storage solution has really simplified my morning routine because—for the first time—I can actually see all of the pieces I own. When completing this project, I even uncovered earrings I had forgotten about.
Eventually, I plan to fill my closet wall with additional frames in various sizes and shapes to create a “gallery wall” of sorts. As a TV journalist, I’ve been collecting vibrant colored discount earrings and dresses for years. Finally, I can show them off in style!
- Read this next: News Anchor Outfits – The BEST of Amazon Dresses
I know not everyone likes DIY projects, or has the time to do them, so I’ve also rounded up some other (attractive) jewelry storage options for you.
Don’t Want to DIY? Try these…
If you have any questions about my project, let me know in the comments below. As always, I’m happy to help!
—-Lindsay
Related Posts

The Easiest DIY Chair Rail
Do you have a big bland wall in your home crying out for some attention…
August 5, 2021
Affordable Neutral Rugs: 10 Places to Snag Them
So, we had a bit of a CATastrophe last week… I’ll spare…
March 3, 2021
Nicola @ Happy Healthy Motivated | 20th Feb 18
I made one of these myself 10+ years ago! But I did it out of necessity, so it was ugly as anything. I still use it but I think it’s time I made it a lot prettier like yours. Hope your guide works out for me! 🙂
Razena | 20th Feb 18
I absolutely love your jewelry solutions, for the earings as well as the necklaces I saw close by. My jewelry box looks in exactly the same disarray as your old one!
linda | 20th Feb 18
Beautiful!!! Texture, luster, color…looks like a piece of gorgeous artwork! Would you be my jewelry box stylist?
Patricia | 20th Feb 18
I love the earing holder! I would probably add some antiquing wax to the frame so it matched my décor better, but I going to do this.
laveremis | 21st Feb 18
That’s is a fantastic idea and I bet it would look great! I considered painting the frames, adding a little silver luster. Have fun with your project!
Kristi Ann | 21st Feb 18
This is adorable!! And what a great wall decoration. I always have the hardest time finding wall art for my bedroom and this totally solves that problem!
Britney Kaufman | 21st Feb 18
So beautiful and organized! Nothing, I mean nothing in my house is organized like this. What a great idea!
Jen ~ The Tipsy Mama | 21st Feb 18
These are adorable and look so easy to make! I feel like they could be really good DIY gifts too! Love this!
Czjai Reyes-Ocampo | 21st Feb 18
I have something similar at home, which I received as a gift from a friend many years ago. I love your collection of earrings, by the way. 🙂
laveremis | 21st Feb 18
Can you tell I have a thing for earrings? I hunt new pieces every time I see a sale going on.
Elizabeth O | 21st Feb 18
This is a great idea, you are so creative! I might give this a try for myself as I love love it!
laveremis | 21st Feb 18
Appreciate the kind words, but I’m only adapting someone else’s great idea! Try it–it has made my morning routine so much speedier.
Emily Fata, www.EmulatingEmily.com | 21st Feb 18
WOW! Not only is this a great way to organize an earring collection, but it’s GORGEOUS, too! I need to make myself one of these ASAP 🙂
laveremis | 21st Feb 18
Thanks so much!
Tara | 21st Feb 18
I did something similar recently bc my armoire was getting too full! it’s such an easy DIY!
Luci | 21st Feb 18
That is a really great idea. My mom has a lot of earrings and Mother’s day is coming soon so I’ll have to make it for her. It looks so easy to make it.
laveremis | 21st Feb 18
I bet she would love that! I hadn’t thought about making these as gifts, but I think my mom could use one too.
Ann F. Snook-Moreau | 21st Feb 18
I’m not super crafty but I think I could even make these! I love that they are both functional and look like pretty art pieces on the wall.
laveremis | 21st Feb 18
It was surprisingly easy and quick!
Penny | 21st Feb 18
You know, it really is a shame to keep all of that beautiful “art” closed away and not look at it! I just love this idea. Thanks!
laveremis | 21st Feb 18
Perhaps that’s why our closet door is almost always open! 🙂
Corina | 22nd Feb 18
I absolutely love it. I could sure use one for my collection of earrings, easy access, all displayed. very cool!
Janella Panchamsingh | 23rd Feb 18
This is an amazing way to display your earrings, i love how it came out. Very creative!
Jennie Bexell | 8th Mar 18
Lindsay, thank you for giving Spot credit for your inspiration. I think you took it to the next lever with the cloverleaf sheet. Beautiful!
Thank you and keep up the great blogging.
Jennie & Spot
laveremis | 12th Mar 18
Thanks so much Jennie, very kind of you!
heather nielson | 9th Nov 19
So beautiful! Have you noticed if your earrings have rusted or discolored over time from being on the metal holder?
laveremis | 9th Nov 19
Hi Heather,
I’ve been using it for more than a year now and have not had that problem at all. I don’t think it would be a worry unless you have the holder in a high moisture area. There has been no discoloration on my jewelry or the metal insert. That said, I do not have much “fine” jewelry. My pieces are all pretty casual. Fine jewelry might behave differently. Great question!
Lisa M | 16th Mar 20
Do you have to take the whole frame down to remove post-style earrings? Most of mine are posts. Yours is the most beautiful solution I have seen! Thank you
laveremis | 16th Mar 20
Hi Lisa, so glad you like it. With a clover leaf pattern metal, I find post style earrings can easily be lifted from the frame. I never take the frame down when grabbing my earrings from it. I would have to have to rehang it each time, lol!
Paula | 8th Jun 22
Where Do you get the cloverleaf sheets?These are awesome.
laveremis | 11th Jun 22
Hi Paula,
So glad you enjoy them! Most craft stores have them (or something similar). I got mine at Hobby Lobby. I believe they are still available.
Best,
Lindsay
Roxie | 15th Jul 23
Great idea! Wondering how do you get the posts on to hang them without taking it off the wall?
laveremis | 15th Jul 23
Hi Roxie,
Thanks for visiting the blog. When I use earrings with circular backs, you slip them in at an angle – the tilt allows you just enough room to navigate them in and out. Occasionally it’s a bit tricky for pieces with larger backs, but I’ve only had to pull it off the wall a few times. If you have fish hook back earrings it’s super easy to use.
Hope you give the project a whirl! Have a beautiful summer – Lindsay