The Easiest DIY Chair Rail
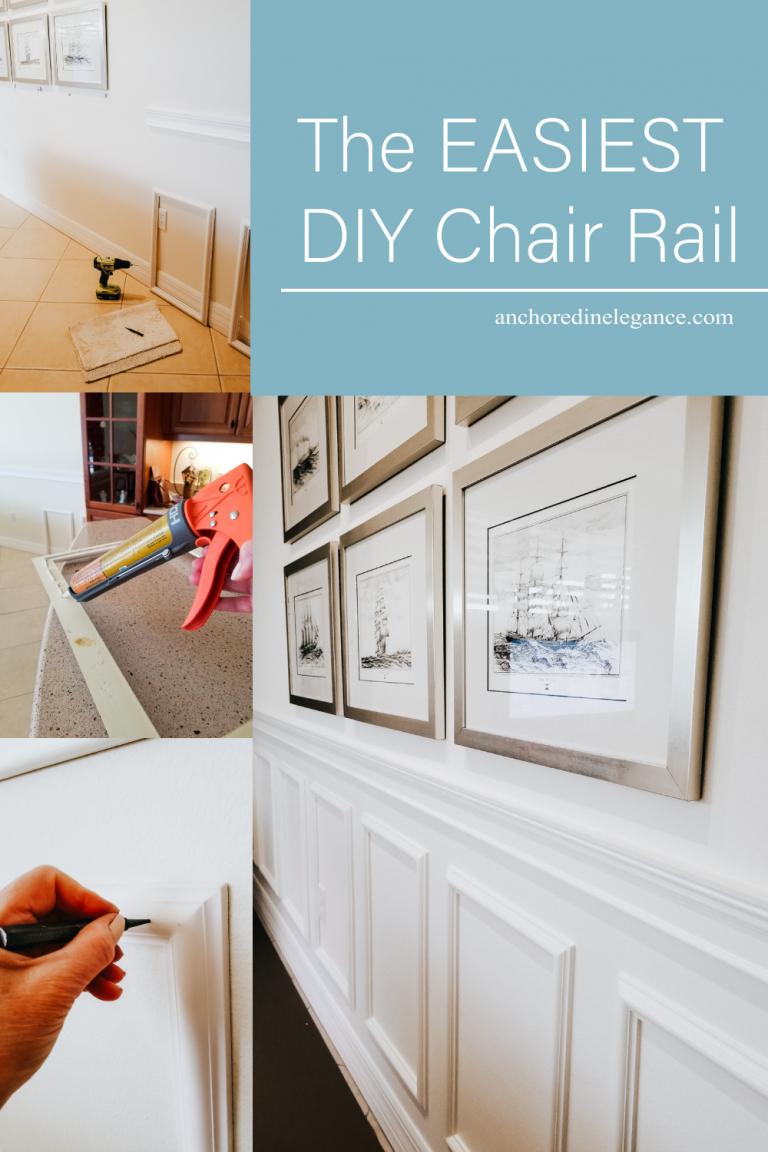
Do you have a big bland wall in your home crying out for some attention? Love the classic look of chair rail, wainscoting, or picture frame molding… but aren’t so keen on the price of professional installation? Let’s add some instant character into your space with a DIY solution! This post walks you through a beginner-friendly DIY chair rail and picture frame molding utilizing pre-formed frames. You’ll need a bit of patience for this installation, but it’s not difficult. Moreover, the traditional charm and high end look it provides is well worth the effort!
My mom, who is not a master carpenter (although quite handy), completed this DIY chair rail solo. She loved the results so much, she wanted me to share the process with you! Her project didn’t require a fancy miter saw… just a hand saw, construction glue, finishing nails, and some careful measurements. We’ll dive into the tutorial shortly. But first, let’s cover a few chair rail basics.
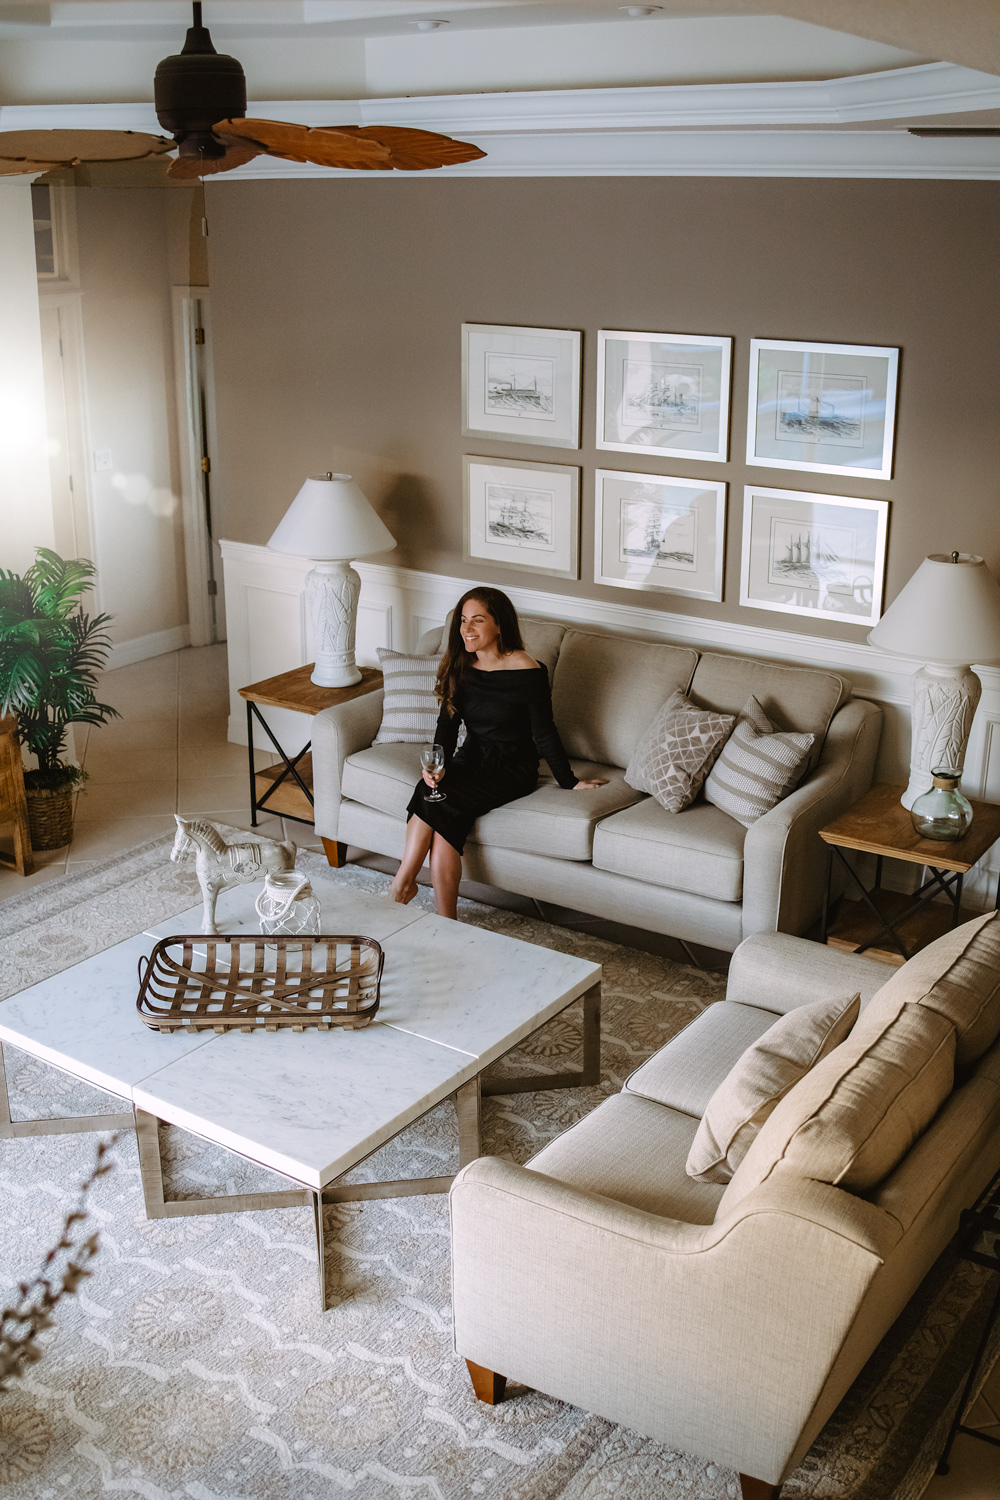
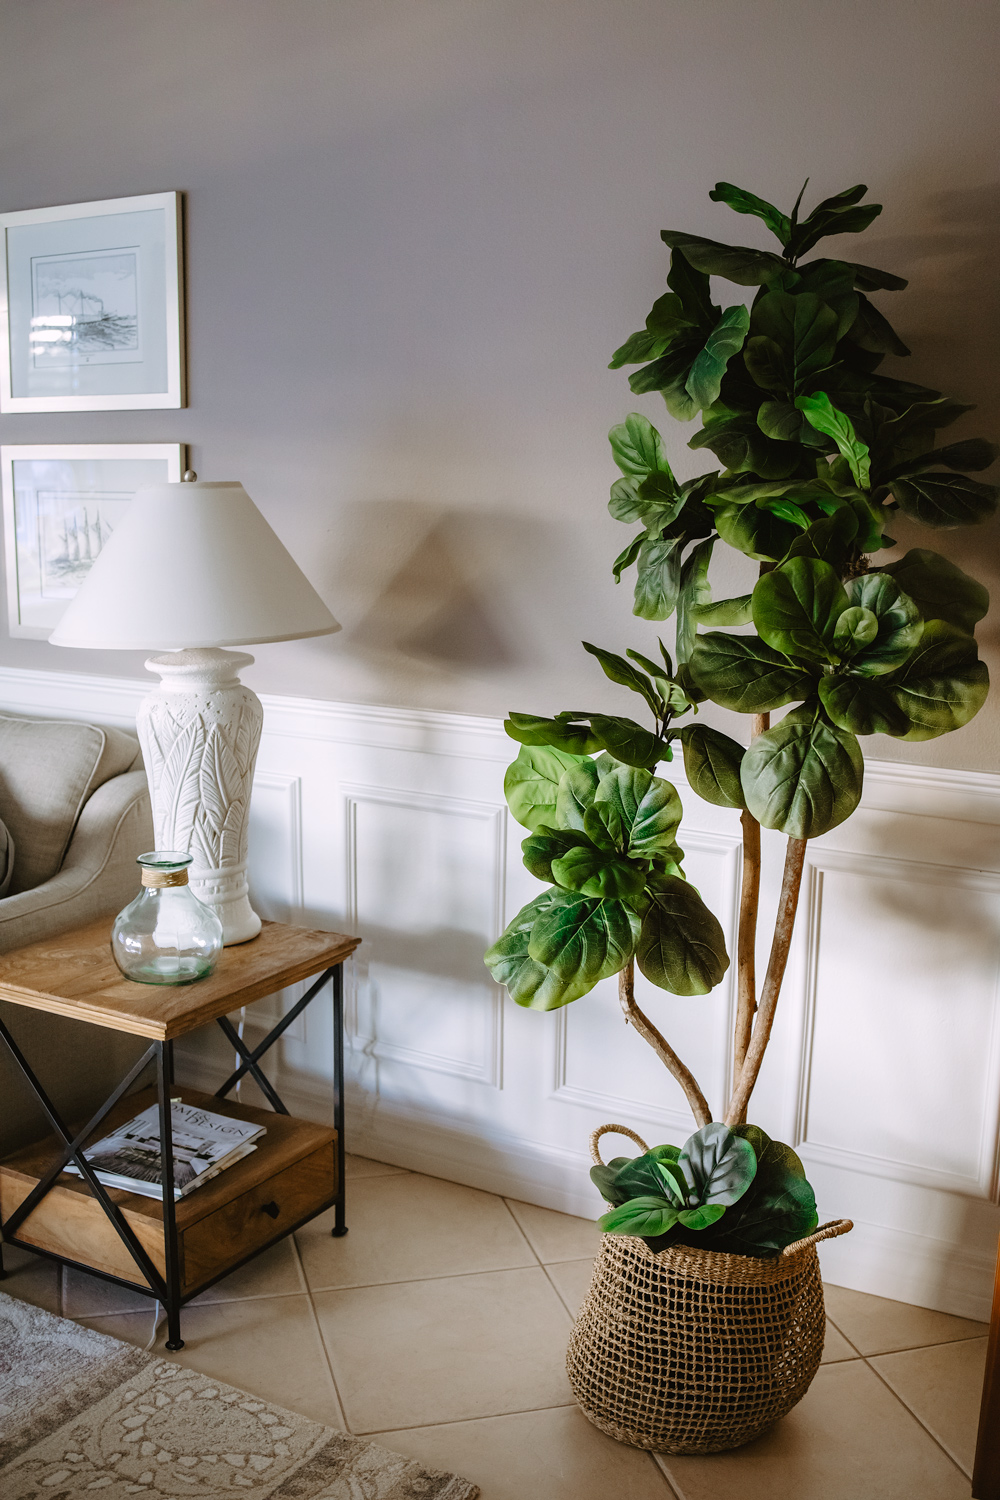

 Loveseat & Sofa (La-Z-Boy – in “Brindle”) | Rug (Oriental Weavers in Ash/Sand) | Coffee Table (Crate & Barrel – 4 End Tables Pushed Together) | Faux Fiddle Fig (Pottery Barn)
What Exactly is Chair Rail?
Chair rails were originally designed to protect your walls from damage. For example, they reduce the scuffs and scratches errant chair backs can leave behind. These days, chair rails typically serve a more aesthetic purpose. However, they often retain their traditional placement. Carpenters typically install them to match the approximate height of most chair backs, about 30 inches from the floor.
Why install a DIY chair rail?
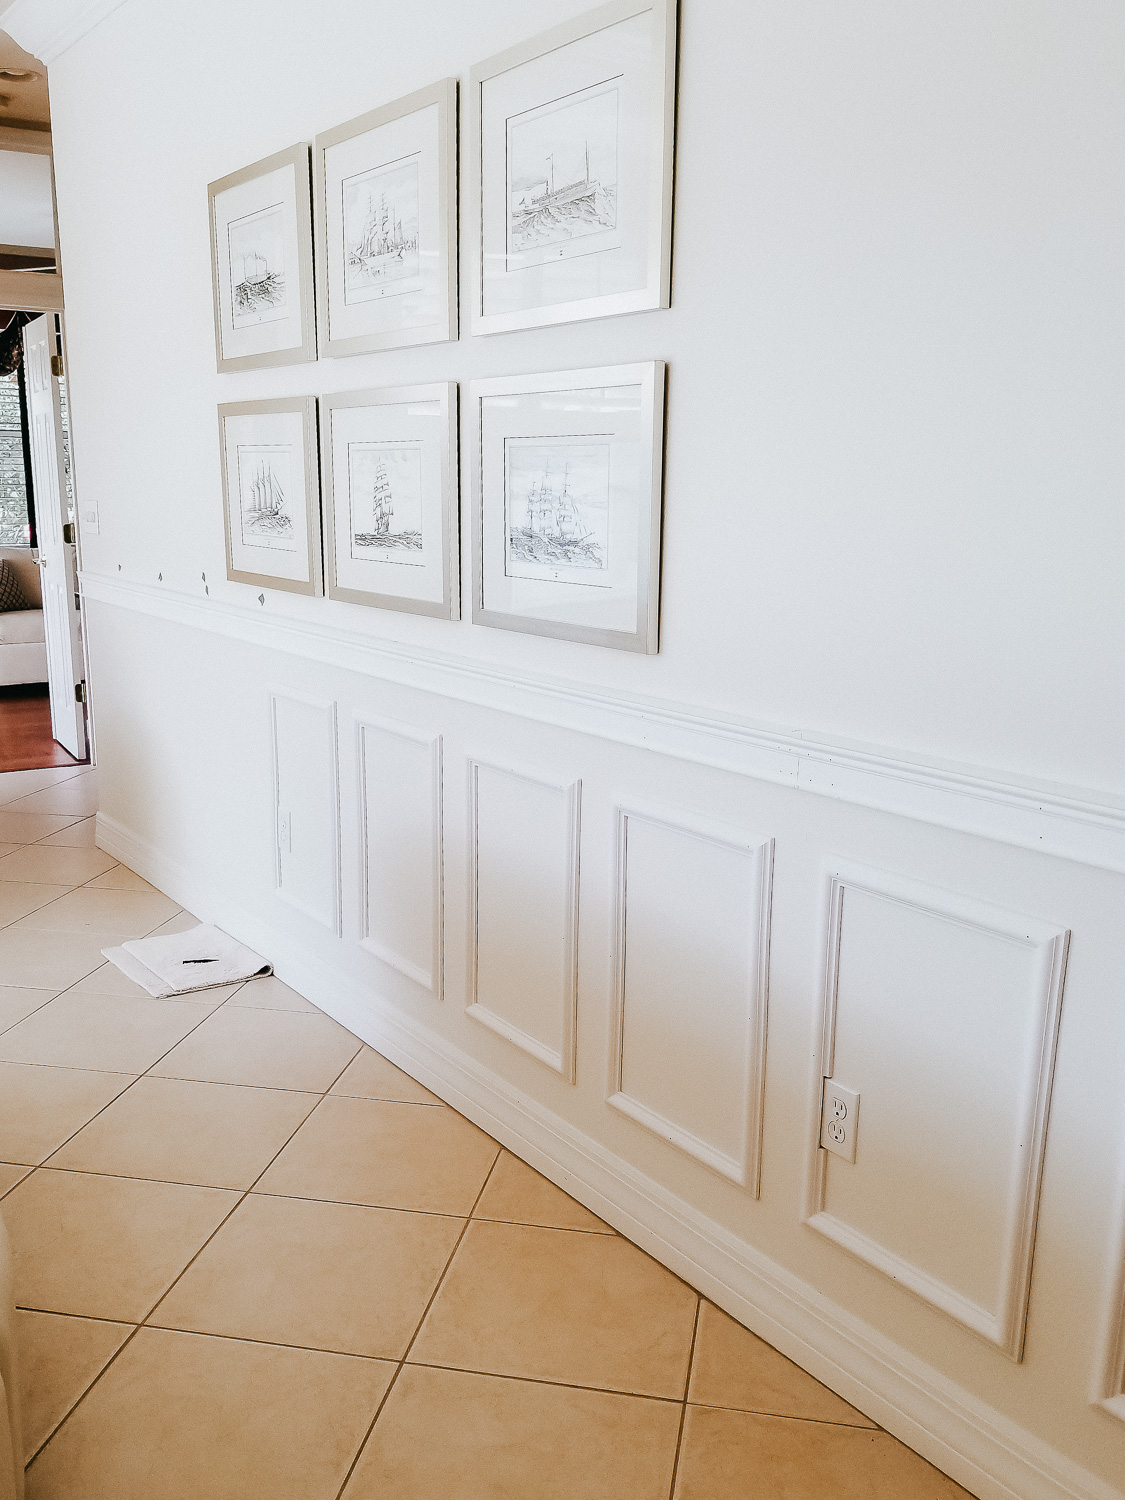
Chair rail adds a ton of interest to your space. Additionally, it helps divide a room cleanly for wall treatments like wallpaper or wainscoting in the upper region. To place a DIY chair rail, you can use the 30″ from the floor guideline… or opt for another standard, positioning it one-third of the way up from the floor. That said, decorative trim is a matter of personal preference. Make sure you consider the overall picture of your room, your furniture, and how you use the space to choose the height that suits it best.
-
Read this next: Affordable Neutral Rugs – 10 Places to Snag Them
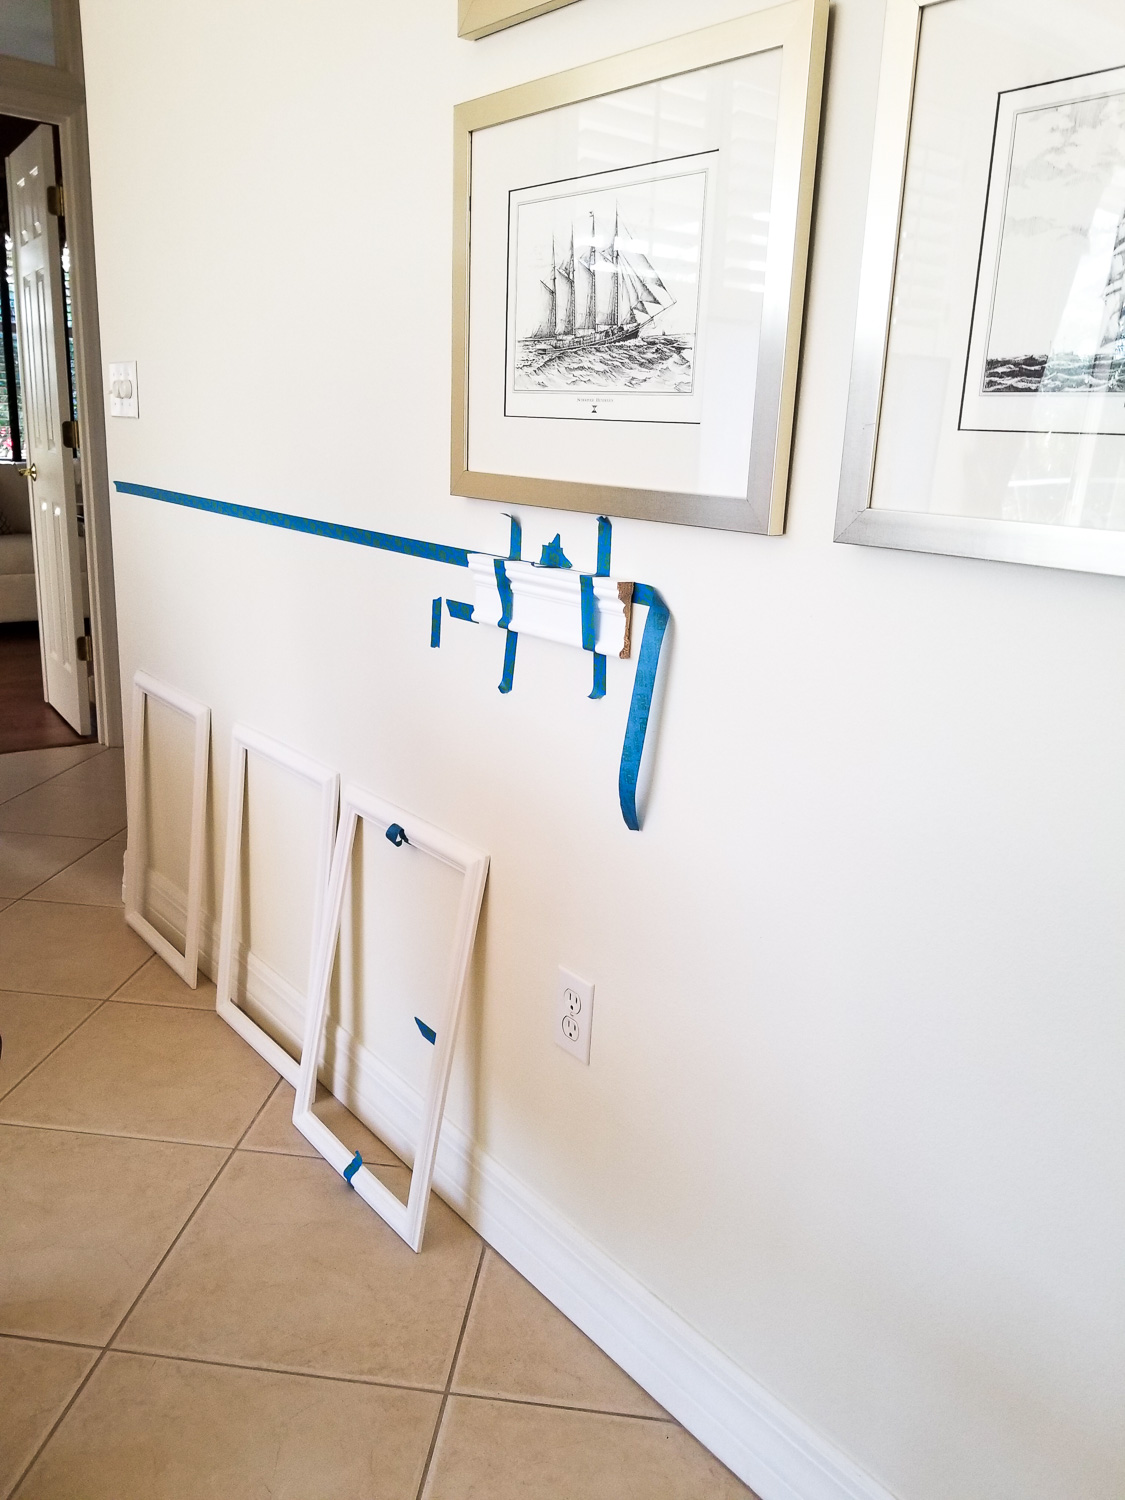
Unsure about the placement? Secure a small piece of your molding to the wall with painter’s tape and step back. Viewing your wall from a natural position (e.g. where you would typically be standing while using that room) is super helpful. My mom wanted her chair rail to align with the kitchen countertops and show just slightly over the sofa back.
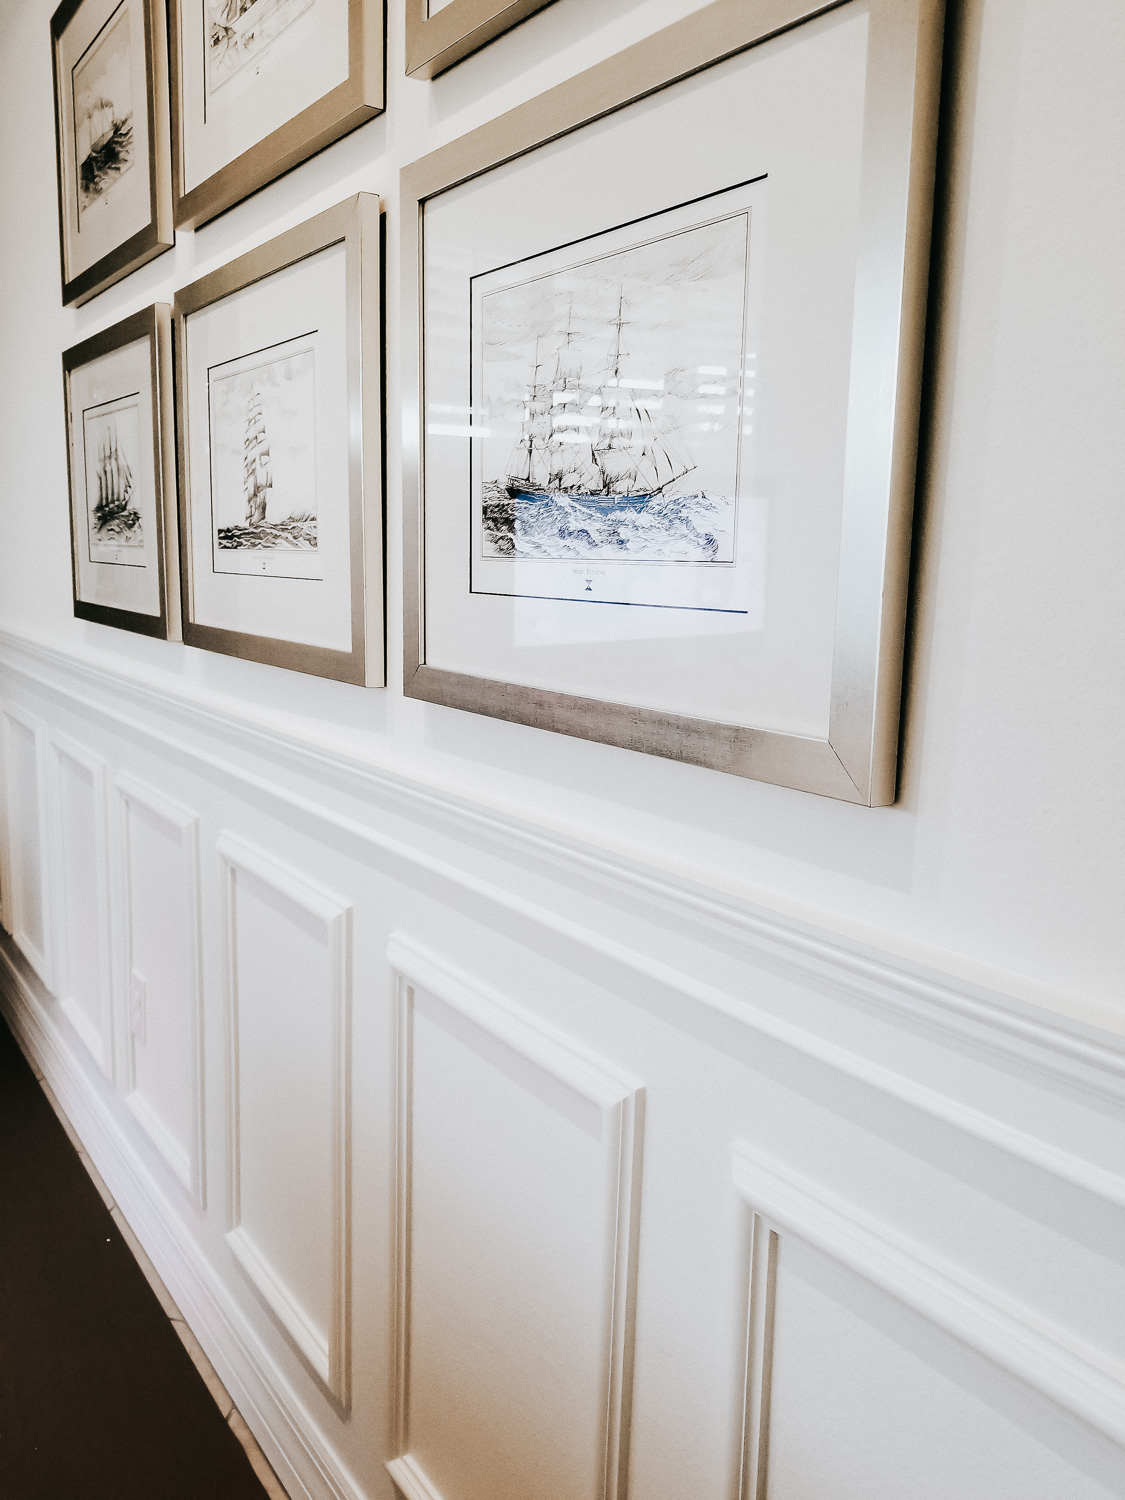
She purchased her chair rail in 8ft long pieces and used a cheap miter box to cut them down to size. After some sanding, the pieces were ready for installation. Next, it’s time to consider what size pre-made frames you will need. Dust off those math skills, because you will need to do some careful calculations to ensure you have an even look. My mom opted for 16″ x 24″ squares.
Several companies sell pre-made molding frames. However, Ekena Millwork (available at Home Depot), seems to offer the widest selection of polyurethane and urethane pieces. The squares my mom used were the Ashford Molded Classic Wainscot Wall Panel style. She purchased 11 of them for the project. They come factory primed, so they are immediately ready for paint. Best of all, they are super lightweight, making installation quick and easy. Once you’ve taken careful measurements and know how many you’ll need, it’s time to dive in!
DIY Chair Rail – Supplies
- Chair Rail Molding
- Base – 5 1/2-6″ base
- Pre-made Molding Panels
- Liquid Nails
- Caulk Gun
- Hammer
- Finishing Nails
- Nail Setter
- Level
- Measuring Tape
- Caulk
- Paintbrush
- Red Devil
- Paint
- Pencil
Directions: DIY Chair Rail + Picture Frame Molding
Step 1: Cut your chair rail to size. If you are dealing with corners, this step might be a bit tricky. However, it is possible to do without power tools. My mom only had a hand saw to cut her chair rail to size. If necessary, sand the end pieces down.
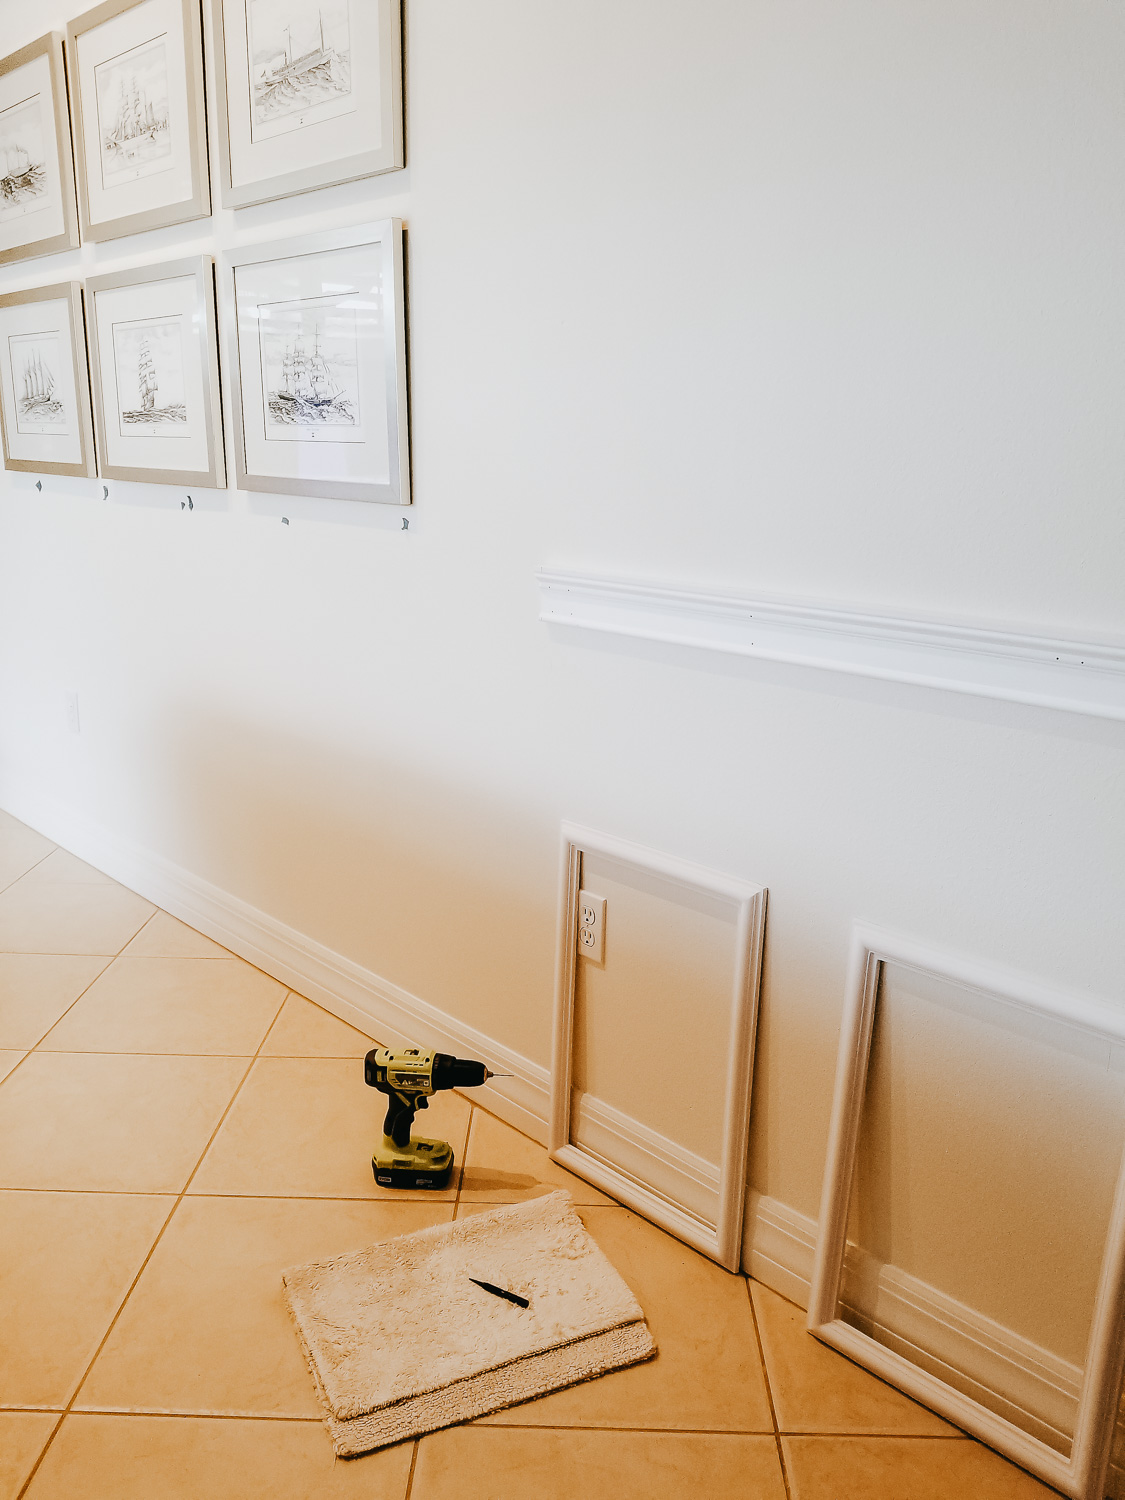
Step 2: Measure carefully, level, and use pencil mark where your chair rail and pre-made molding rectangles will go. If you have super high ceilings, it’s okay to go above the standard 30 inches from the ground. My mom opted for 35″ from the floor.
Step 3: Place a piece of plywood on your counter or floor to protect it. Next, it’s time to pre-nail your molding and chair rail. For the molding, tap finishing nails into the four corners. The nail should be poking through slightly.
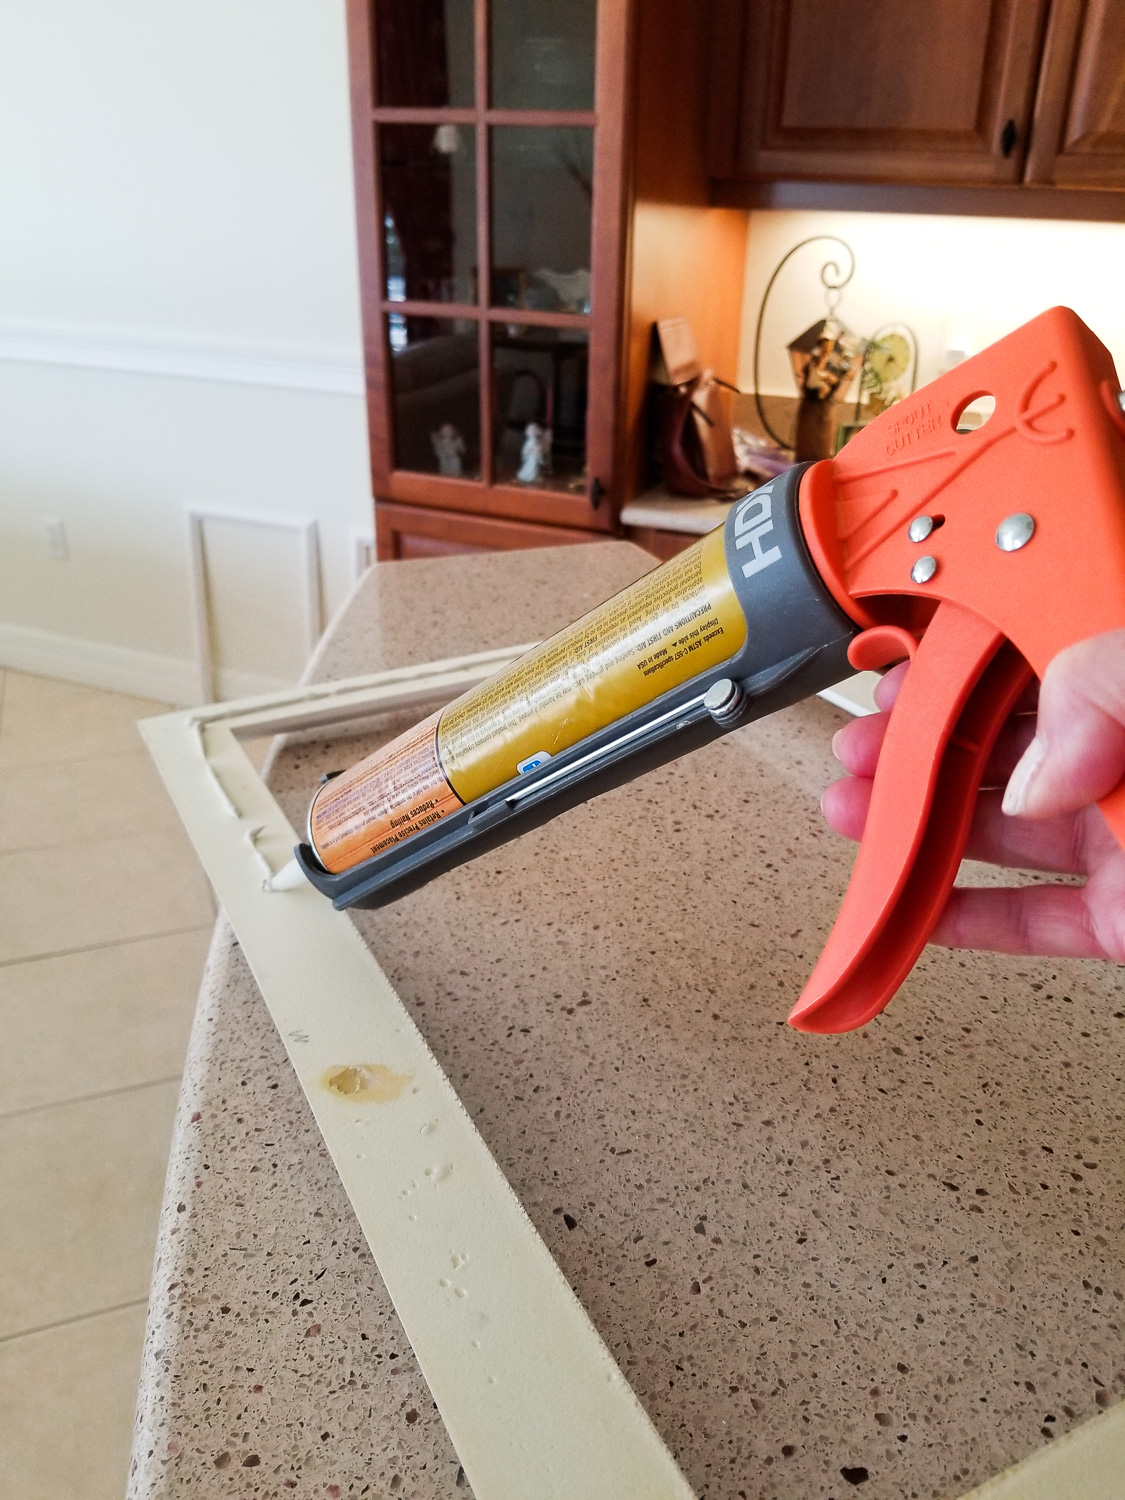
Step 4: Flip your molding over and apply glue. You do not need a lot of glue, just one bead.
Step 5: Align your molding with your pencil marks and hammer in. When you hit drywall, stop. It’s important you don’t hit the foam molding. It will dent.
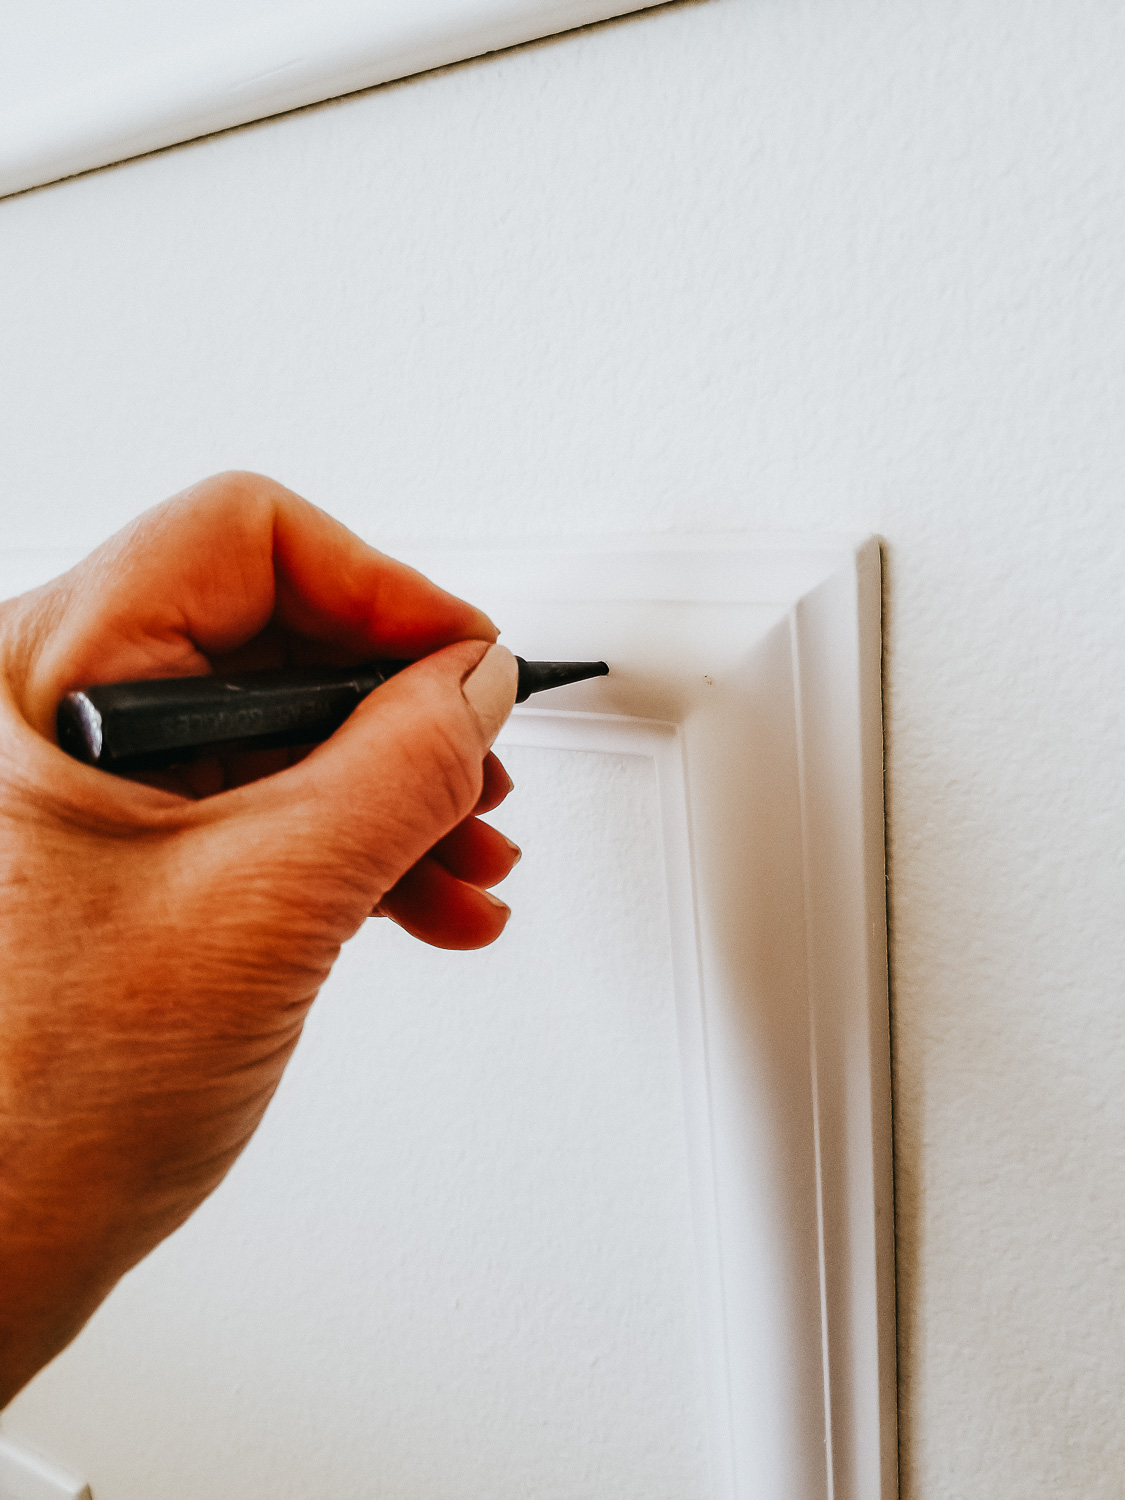
Step 6: Counter sink your nails three-eighths of an inch or a quarter inch. Use Red Devil lightweight filler to fill holes. Next, sand for a smooth finish.
Step 7: Let panels dry overnight before caulking. Caulk around the inside and outside of the frame. Allow time to dry.
Step 8: Paint as desired.

Furniture Sources:
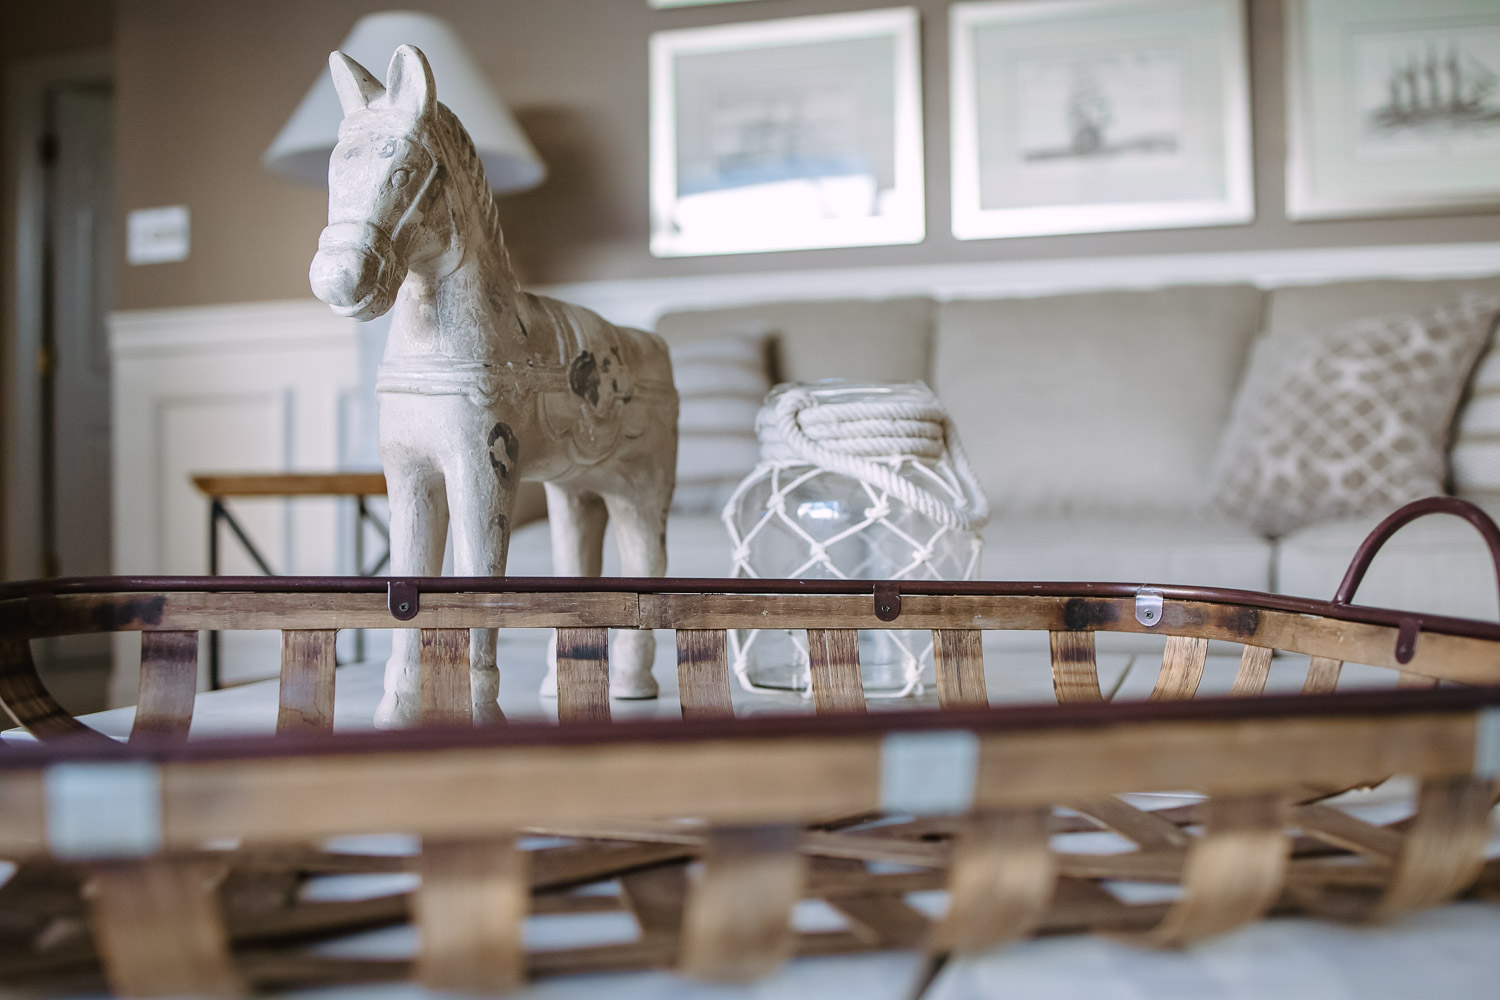
The rug is from the Oriental Weavers craft collection and is in the Ash/Sand color. The coffee table is four end tables pushed together. My mom purchased hers at a Sarasota, Florida furniture shop called The Pamaro Shop. It no longer carries the tables. However, Crate and Barrel does. The style is called the Kimball. You can find the loveseat and sofa via La-Z-Boy. It is the Talbot style in the color “brindle”. The set of prints came from an antique store. However, you can find something similar on Etsy or Wayfair. You can score a similar faux fiddle fig tree at Pottery Barn. The rest of the pieces were sourced from discount stores like T.J. Maxx and Marshalls.
Do you enjoy this type of DIY décor? Here are a few additional posts to explore:
Related Posts

Affordable Neutral Rugs: 10 Places to Snag Them
So, we had a bit of a CATastrophe last week… I’ll spare…
March 3, 2021
How to Decorate Above The Bed
We’ve lived in our current home for more than three years now. Most…
May 29, 2020
Ayana | 3rd Jul 23
This has been THEE most helpful DIY moulding tutorial I’ve come across. Thank you thank you thank you!
laveremis | 3rd Jul 23
So glad to hear that! Hope your project turns out amazing!!!
BJ LYLE | 30th Oct 23
The chair rail shown is not what the link directs you to
laveremis | 10th Nov 23
Thanks for letting me know BJ! I’ll check into the link and try to correct it. This is an older post and sometimes links can change over time.
Kim | 1st Nov 23
I love this. Can you do just 1 wall? I’m looking to add interest on in a hallway where I want to hang some large framed photos. The photos alone look boring.
laveremis | 10th Nov 23
Absolutely! In fact, the example in this post is a single feature wall. It is the only one with chair rail.
Mel | 22nd Dec 23
This is so helpfull! This may sound silly but do you have an easy way to measure for how many frames you need per wall? Thanks!
laveremis | 21st Feb 24
Hi Mel, sorry that I’m just seeing this now. There’s not really any easy way – aside from measuring the entire wall and then doing the math based on the type of spacing you want. I wish I had a better trick for you!